To disassemble the lower Whirlpool refrigerator freezer door, follow these steps carefully. We will guide you through the process, ensuring a seamless dismantling experience.
Whether you’re troubleshooting a problem or replacing a component, this step-by-step guide will help you disassemble your Whirlpool refrigerator freezer door efficiently and effectively.

Preparing For Disassembly
Before you begin the disassembly process for your Whirlpool refrigerator freezer door, it is crucial to properly prepare yourself and gather the necessary tools.
Taking the right safety precautions will not only ensure a smooth disassembly but also minimize the risk of accidents or damages.
In this section, we will discuss the steps you need to take before getting started.
Gathering The Necessary Tools For The Job
The first crucial step before disassembling your Whirlpool refrigerator freezer door is to gather all the required tools. Having the right tools at hand will make the process easier and save you from unnecessary frustration.
Here is a list of tools you will need:
| Tools | Description |
|---|---|
| Screwdriver set | A set of screwdrivers with various sizes and types (Phillips, flathead) to remove screws. |
| Hex key set | A set of hex keys to loosen or tighten hex screws. |
| Socket wrench set | A set of socket wrenches to handle bolts or nuts. |
| Pliers | Both needle-nose and regular pliers for gripping and holding small parts. |
| Protective gloves | Heavy-duty gloves to protect your hands from sharp edges or any potential injuries. |
| Safety goggles | Goggles to shield your eyes from debris. |
| Disposable gloves | Disposable gloves to ensure cleanliness and hygiene. |
Make sure you have all the tools listed above before moving forward with the disassembly process. Keep them within reach to avoid interruptions and delays.
Safety Precautions To Take Before Starting
Disassembling a refrigerator freezer door can involve some potential risks. To ensure a safe disassembly process, it is crucial to take the following safety precautions:
- Disconnect the refrigerator from the power source to avoid electric shock.
- Keep children and pets away from your working area.
- Wear protective gloves and safety goggles to protect your hands and eyes.
- Cover the floor with a protective sheet to prevent any scratches or damages.
By following these safety precautions, you can prevent accidents, injuries, and damages during the disassembly process. Safety should always be your top priority.
Removing The Door Front Panel
One of the essential tasks when disassembling a lower Whirlpool refrigerator freezer door is removing the front panel. This step allows you to access and work on the various components behind it.

Identifying The Screws Holding The Panel In Place
The first step in removing the door front panel is to identify the screws that hold it in place. These screws may vary in number and location depending on the specific model of your Whirlpool refrigerator.
Before proceeding, ensure you have the necessary tools, including an appropriate screwdriver. To identify the screws, carefully examine the edges and corners of the front panel.
Using The Appropriate Screwdriver To Remove The Screws
Once you have identified the screws, it is crucial to have the correct screwdriver to remove them effectively. Using the wrong size or type of screwdriver could strip the screws or make the task more challenging.
Check the head of each screw and select the corresponding screwdriver. Usually, flathead or Phillips screwdrivers are commonly used for refrigerator door front panels.
When removing the screws, make sure to apply steady pressure and keep the screwdriver aligned with the screw. This helps to prevent slipping or damaging the surrounding area.
Carefully Lifting And Removing The Front Panel
After removing all of the screws, you can now carefully lift and remove the front panel from the Whirlpool refrigerator freezer door. It is essential to handle the panel with care to avoid any unnecessary damage. Slowly and gently lift the panel, ensuring it remains level and balanced.
Once the panel is lifted, set it aside in a safe place where it won’t get damaged. Make sure to keep track of the screws removed, as they will be needed when reassembling the front panel later on.
With the front panel successfully removed, you can now proceed with the necessary repairs or maintenance tasks on your Whirlpool refrigerator.
Remember to follow proper safety precautions and consult the appliance manual if needed.
Removing The Inner Door Panel
Learn how to disassemble the lower Whirlpool refrigerator freezer door by removing the inner door panel. Discover step-by-step instructions for an easy and efficient process.

Locating And Removing Any Additional Screws
To successfully disassemble the lower Whirlpool refrigerator freezer door, the first step is to locate and remove any additional screws that may be securing the inner door panel. These screws are vital in holding the panel in place, and therefore, they must be carefully removed to avoid causing any damage to the door.
Take a moment to inspect the door panel and look for any visible screws that need to be unscrewed.
Once you have visually identified the screws, use a suitable screwdriver to carefully unscrew them. It’s crucial to ensure that you use the correct size and type of screwdriver to avoid stripping the screws and causing unnecessary complications.
Slowly and steadily turn the screwdriver counterclockwise, one screw at a time, until they are completely removed from the door panel.
Using A Putty Knife To Gently Pry Off The Inner Panel
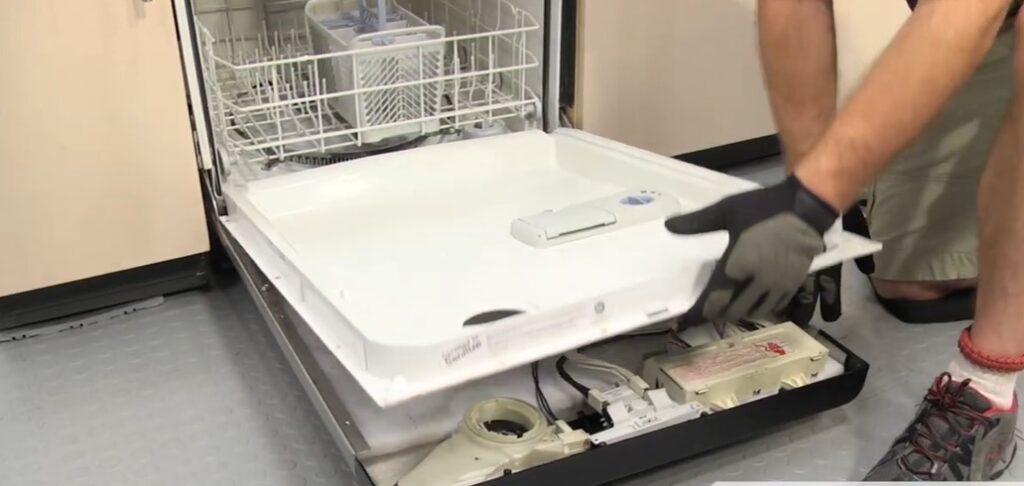
After removing the screws, the next step involves using a putty knife to gently pry off the inner panel. A putty knife is a versatile tool that provides the necessary leverage to separate the panel from the door without causing damage.
Place the putty knife at the edge of the panel and apply slight pressure to create a gap between the panel and the door.
Once you have created a small gap, carefully move the putty knife along the edges of the panel to gradually separate it from the door. Be cautious and exercise patience during this process to prevent any cracks or breakage.
Remember, the goal is to detach the inner panel smoothly without causing any harm to its structure or the surrounding components.
Ensuring Any Wiring Or Components Are Properly Disconnected
As you remove the inner door panel, it’s essential to ensure that any wiring or components attached to it are properly disconnected. These components may include switches, lights, or any other electrical connections.
Failure to disconnect these components properly can result in electrical shock or damage to the refrigerator, so it’s crucial to exercise caution throughout this step.
Inspect the inner panel for any wiring or connectors. If you notice any, locate the appropriate connections and gently detach them. This can usually be accomplished by carefully pulling on the connectors or using a pair of pliers to disconnect them.
Take your time to ensure that each wire or component is disconnected correctly before proceeding any further.
Disassembling The Freezer Door Handle
Learn how to disassemble the lower Whirlpool refrigerator freezer door handle with this step-by-step guide. Easily remove and replace the handle without any hassle.

Detaching The Handle From The Door
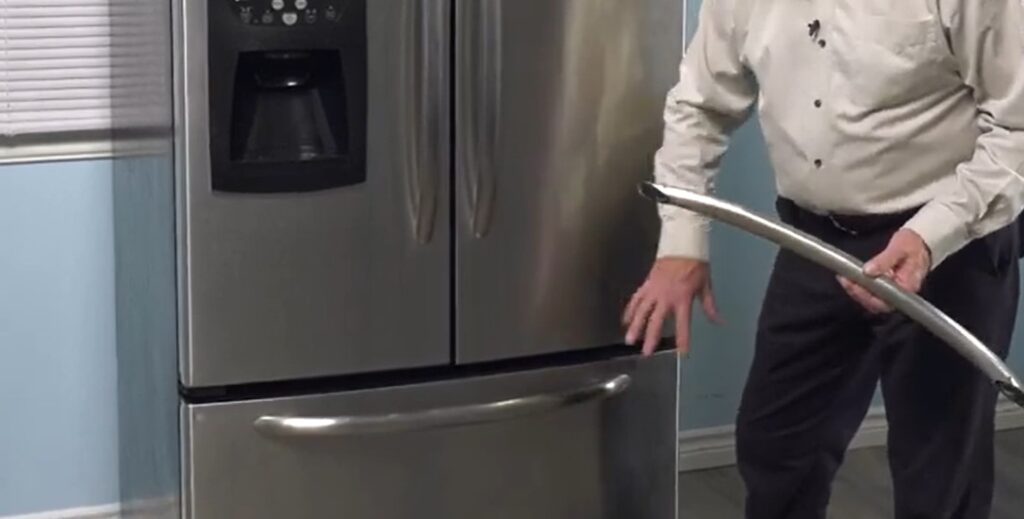
To begin disassembling the freezer door handle of your Whirlpool refrigerator, you first need to detach it from the door. This process may vary slightly depending on the specific model of your appliance. However, the general steps remain the same.
Removing Any Screws Or Bolts Securing The Handle
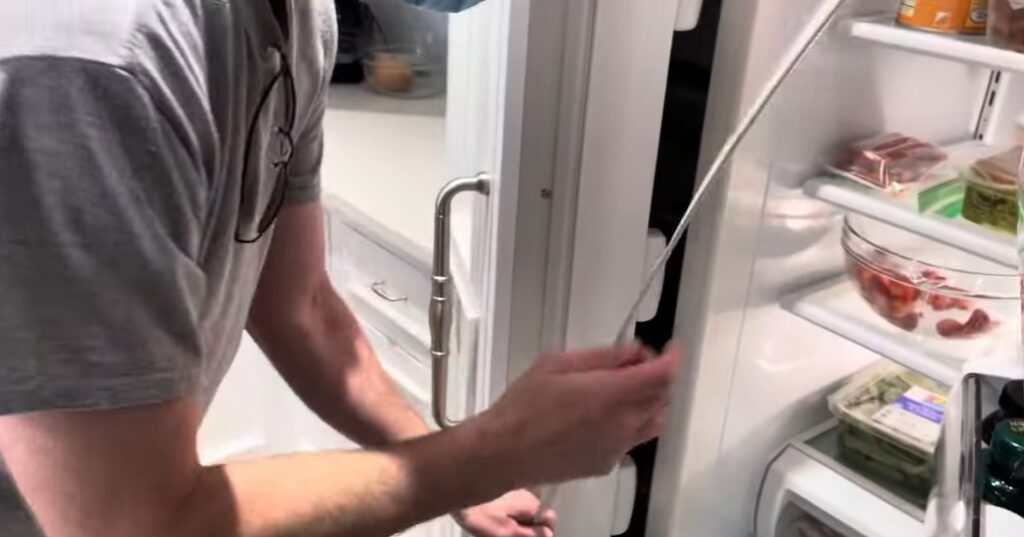
Start by carefully examining the handle to locate any screws or bolts that may be securing it to the door. These fasteners are usually found on the inside of the door or concealed beneath caps. You can use a screwdriver or a power drill with the appropriate attachment to remove them.
Take note of the size and type of screws or bolts used, as this information will be helpful when reassembling the handle later.
Carefully Sliding Or Lifting The Handle Off The Door
Once the screws or bolts are removed, you can proceed to slide or lift the handle off the door. This can be done by applying gentle pressure and using a wiggling motion if necessary. Be mindful of any clips or hooks that may be holding the handle in place.
Take your time and ensure that you don’t force it, as this could damage the handle or the door.
If sliding the handle does not work, try lifting it directly off the door. Some handles may have a vertical orientation and are designed to be lifted off. Pay attention to any additional mechanisms that may be holding the handle in place and release them if needed.
By following these steps, you can successfully disassemble the freezer door handle of your Whirlpool refrigerator. Remember to keep track of all the components and screws removed for an easier reassembly process.
Removing The Door Hinges
When it comes to disassembling the lower freezer door of your Whirlpool refrigerator, removing the door hinges is a crucial step. By following these simple instructions, you will be able to detach the door with ease.
Identifying The Hinge Location
The first step in removing the door hinges is to identify their location. The hinges are typically located at the top and bottom corners of the fridge door. Take a moment to inspect the door and locate the screws or bolts that hold the hinges in place.
Make sure you have the necessary tools, such as a screwdriver or wrench, to loosen and remove them.
Loosening And Removing The Hinge Screws Or Bolts
Once you have located the hinges, it’s time to loosen and remove the screws or bolts that secure them. Use your screwdriver or wrench to carefully loosen each screw or bolt, making sure not to damage the surrounding area.
Keep in mind that some models may have multiple screws or bolts holding the hinges in place, so be sure to check for all of them.
|
TIP: It’s always a good idea to have a magnetic tray or container nearby to keep track of the screws or bolts as you remove them. This will prevent any loss or misplacement. |
Detaching The Door From The Refrigerator Cabinet
With the screws or bolts removed, you can now detach the door from the refrigerator cabinet. Gently lift the door upwards, making sure to support its weight properly. As you lift, you should feel the door becoming loose from the hinges.
Continue lifting until the door is completely separated from the cabinet. Place the door in a safe and flat area to prevent any damage.
WARNING: Refrigerator doors can be heavy, so it’s important to take caution and ask for assistance if needed. A dropped door can cause injury or damage to the appliance.
Following these steps will allow you to successfully remove the door hinges of your Whirlpool refrigerator’s lower freezer door. By doing so, you can gain access to the inner components for maintenance or repair purposes.
Remember to keep track of the screws or bolts and handle the door with care to avoid any accidents.
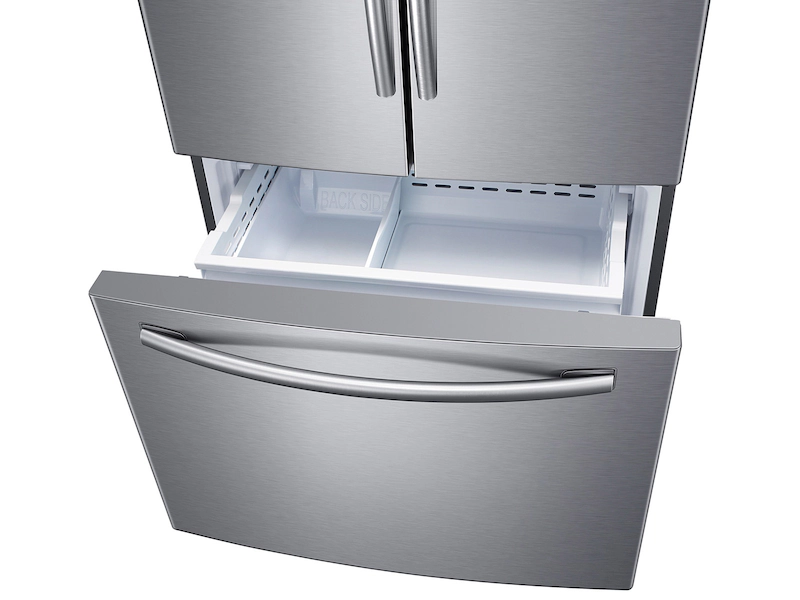
How Do I Disassemble the Lower Door of My Whirlpool Refrigerator Freezer?
To disassemble the lower door of your Whirlpool refrigerator freezer, follow these steps:
1. Open the freezer door and locate the screws on the bottom edge of the door.
2. Use a screwdriver to remove the screws.
3. Lift the lower door panel upwards to remove it.
4. Be sure to note the position and arrangement of any hinges or brackets for reassembly.
How to adjust double swing door hinges?
Ah, the intricate dance of double swing door hinges – a choreography of balance and precision! In the artistry of adjustments, envision yourself as the maestro, orchestrating a seamless movement. Now, consider these steps:
- Locate the Adjustment Screws: Your hinges likely have adjustment screws. Find them on the top and bottom of each hinge.
- Mark the Current Position: Before diving into adjustments, mark the current position of the hinges. This ensures you can revert to the original setup if needed.
- Horizontal Adjustment: To address horizontal misalignment, turn the adjustment screws on the top and bottom hinges clockwise or counterclockwise. Experiment until the door swings smoothly.
- Vertical Adjustment: If vertical adjustment is necessary, focus on the bottom hinge. Turn the adjustment screw to raise or lower the door as needed.
- Experiment and Test: Make incremental adjustments, testing the door’s swing after each change. This allows you to fine-tune the alignment.
- Repeat as Necessary: If you have a double swing door, perform these adjustments on both sides for symmetry.
How to Adjust Refrigerator Door Swing?
Ah, the choreography of refrigerator door swing adjustments – a dance of culinary convenience! Now, picture yourself as the director of this household performance. In the realm of refrigerator solutions, consider these steps:
- Determine the Hinge Type: Refrigerators typically have either top hinges or bottom hinges. Identify which type your refrigerator employs.
- Top Hinge Adjustment: For top hinges, locate the screws on the top of the refrigerator door. Loosen these screws slightly to allow for movement.
- Swing Direction: If you wish to change the swing direction, lift the door off the hinge pins and relocate it to the desired side. Ensure a snug fit, then tighten the screws.
- Bottom Hinge Adjustment: For bottom hinges, find the screws at the bottom of the door. Loosen them to facilitate adjustments.
- Horizontal Alignment: If the door needs horizontal alignment, shift it left or right as necessary. Once satisfied, tighten the screws.
- Test the Swing: Open and close the refrigerator door to ensure it swings smoothly without any resistance.
- Repeat as Needed: If your refrigerator has double doors, repeat these steps for the other door to maintain symmetry.
How to Disassemble a Refrigerator?
Ah, the deconstruction of a refrigerator – a dismantling symphony! In the realm of appliance mastery, envision yourself as the virtuoso of disassembly. Now, consider these steps with utmost precision:
- Empty the Refrigerator: Begin by removing all contents, including shelves, drawers, and any perishables. This ensures a clean slate for your deconstruction masterpiece.
- Unplug the Refrigerator: Prioritize safety by disconnecting the power supply. Locate the power cord and unplug it from the electrical outlet.
- Remove Adjustable Shelves and Drawers: Take out any adjustable shelves or drawers inside. Some may require lifting and tilting to release from their tracks.
- Detach Door Bins: If your refrigerator has door bins, remove them by lifting upward or sliding them off their brackets.
- Unscrew the Hinges: For a full disassembly, unscrew the hinges using the appropriate tools. This step may require a second person to assist with holding the door.
- Release Water and Ice Dispenser Connections: If applicable, disconnect any water or ice dispenser lines. Usually, these have quick-release mechanisms or screws.
- Locate Additional Screws: Examine the exterior and interior for any screws securing panels or components. Remove these screws carefully.
- Separate Components: Once all screws are removed, gently pry apart the various components, starting from the top and working your way down.
- Remove the Compressor and Motor: If you’re venturing into advanced disassembly, locate and detach the compressor and motor. Follow the manufacturer’s guidelines for these components.
While doing this, visualize yourself as the maestro of deconstruction, orchestrating each step with finesse. Now, any more household ensembles you’d like to conduct, master of dismantling?
How to open Samsung refrigerator door?
In the world of seamless access, envision yourself as the keymaster of refrigerated treasures. Now, consider these steps to gracefully open a Samsung refrigerator door:
- Locate the Handle: Samsung refrigerators typically have handles on either side of the door. Identify the handle on the side you wish to open.
- Grip the Handle Firmly: With a confident grasp, hold the handle securely. Ensure your grip is comfortable and steady.
- Apply Gentle Pressure: Apply a gentle and consistent pulling force to the handle. The door should release smoothly, swinging open to reveal the culinary wonders within.
- Use Two Hands, if Necessary: For larger or heavier refrigerator doors, consider using two hands on the handle for better control and balance.
- Check for Latches or Locks: Some Samsung refrigerators may have additional features like child locks or latches. Ensure these are disengaged or unlocked before attempting to open the door.
- Inspect for Obstructions: Occasionally, items inside the refrigerator may shift and momentarily obstruct the door. Gently push or rearrange items if needed.
Conclusion
Disassembling the lower Whirlpool refrigerator freezer door is a simple process that can be done by following a few easy steps. By carefully removing the necessary components, such as the handle and trim pieces, you can access and clean the door more effectively.
Remember to refer to the manufacturer’s manual and take proper safety precautions. With these tips, you can keep your refrigerator running efficiently and maintain its overall performance.
