To remove the front panel of a Samsung fridge drawer, you can follow these steps: 1. Open the drawer fully. 2. Locate the clips on the sides of the drawer front. 3. Push in the clips and gently pull the front panel away from the drawer. 4. Carefully lift and remove the front panel.
Preparing For Removal
Learn how to remove the front drawer of your Samsung fridge easily and efficiently with these simple steps. Keep your fridge clean and organized by following this straightforward process.
Before attempting to remove the drawer front of your Samsung fridge, there are a few important steps you should follow to ensure a smooth and hassle-free process.
By checking the model number, gathering the necessary tools, turning off and unplugging the fridge, and emptying the drawer and removing any items on the front panel, you can make sure everything is properly prepared for the removal.
Follow these instructions carefully to avoid any potential complications:
Check The Model Number And Gather Necessary Tools:
- Find the model number of your Samsung fridge, usually located on a sticker inside the fridge or on the back of the appliance. This will help you identify the correct instructions for removing the drawer front.
- Once you have the model number, search for specific instructions or guidelines in the owner’s manual or online resources provided by Samsung.
- Gather the necessary tools required for removing the drawer front. These may include a screwdriver, pliers, or a similar tool, depending on the specific model.
Turn Off And Unplug The Fridge:
- Before starting the removal process, it is crucial to turn off the fridge’s power supply. Locate the refrigerator’s power switch or unplug it from the electrical outlet.
- This step is essential to ensure your safety and prevent any electrical accidents or damage to the fridge during the removal process.
Empty The Drawer And Remove Any Items On The Front Panel:
- Remove all items stored in the drawer front, taking care to safely transfer any perishable or fragile items to an alternative storage location.
- Check the front panel of the drawer for any accessories, such as handles or screws, that may need to be detached before removing the drawer front.
- Carefully remove any accessories using the appropriate tools, making sure to keep them in a safe place for reassembly later.
By following these steps, you will be well-prepared to remove the drawer front of your Samsung fridge with ease and efficiency. Remember to consult the specific instructions for your model to ensure the correct removal process and prevent any accidental damage to your appliance.

Removing The Drawer Front
Learn how to effortlessly remove the front panel of your Samsung fridge drawer with our step-by-step guide. Say goodbye to any hassle and get ready to tackle this task with ease.
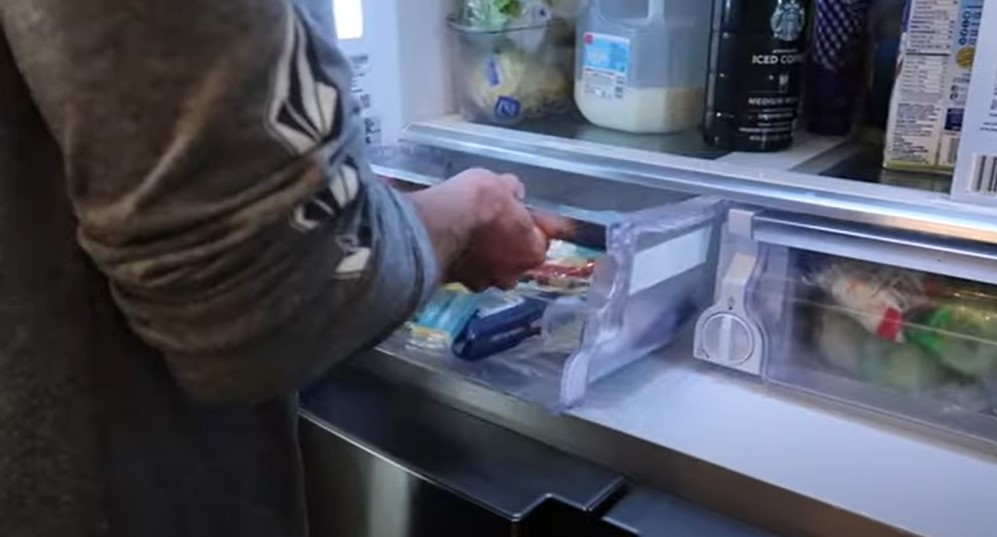
The drawer front of your Samsung fridge allows easy access to your stored items. If you need to remove the drawer front for cleaning or maintenance purposes, follow these simple steps:
Locate The Tabs Or Screws That Secure The Front Panel
- Take a close look at the bottom part of the drawer front. You should see either small tabs or screws.
- These tabs or screws hold the front panel in place and prevent it from easily detaching.
- Ensure you have a clear view of the tabs or screws before proceeding to the next step.
Use A Screwdriver Or Appropriate Tool To Loosen The Screws
- Grab a screwdriver or another suitable tool, depending on the type of fastening mechanism used.
- Insert the screwdriver into the corresponding slots or apply it to the screws located on the bottom of the front panel.
- Rotate the screwdriver counterclockwise to loosen the screws gently. Take care not to damage the surrounding area.
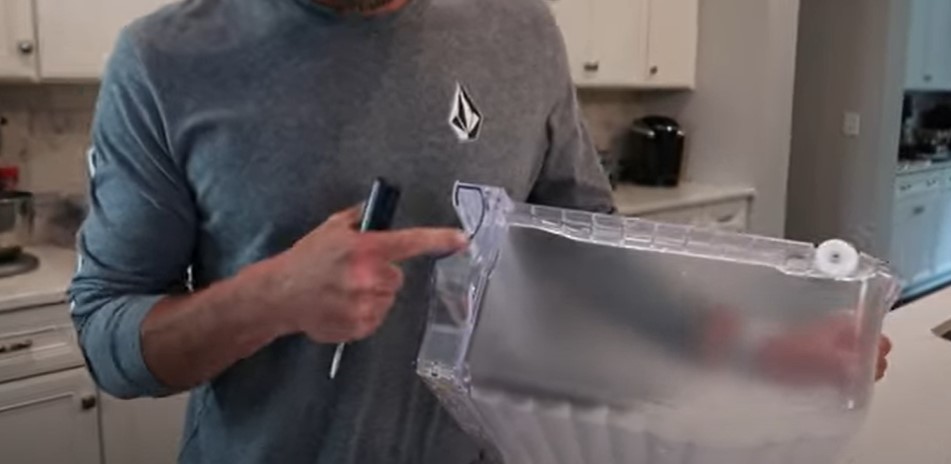
Gently Lift Or Slide The Front Panel To Detach It From The Drawer
- Once the screws are loosened, you can start detaching the front panel from the drawer.
- Hold the front panel firmly with both hands, one on each side.
- Lift the front panel upwards or slide it horizontally, depending on the design of your fridge.
- Be careful and apply gentle force to avoid any damage to the front panel or drawer.
Troubleshooting And Tips
Get step-by-step troubleshooting tips on how to remove the front of your Samsung fridge drawer. Easily follow our guide to ensure a smooth removal process without any hassle.
Dealing With Stuck Or Stubborn Front Panel:
If you are facing difficulty in removing the front panel of your Samsung fridge drawer, follow these troubleshooting tips:
- Ensure the drawer is fully closed: Before attempting to remove the front panel, make sure the drawer is closed properly. Sometimes, a partially open drawer can cause resistance and make removal challenging.
- Use a firm grip: When attempting to remove the front panel, it is important to have a strong grip. This will help you exert the necessary force without accidentally damaging the fridge or panel.
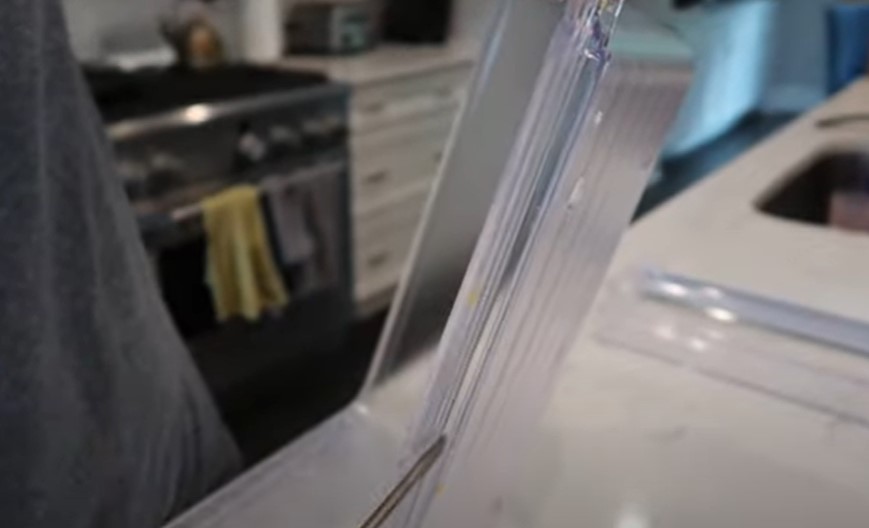
- Apply gentle pressure: Start by applying gentle force to the edges of the front panel. Use your fingers or a plastic pry tool to avoid scratching the surface. Gradually increase the pressure as needed, but be cautious not to use excessive force.
- Wiggle and lift: If the front panel is still stubborn, try wiggling it from side to side while lifting it up. This motion can help loosen any tight spots or potential debris that may be causing the resistance.
- Check for screws or clips: Some fridge models may have screws or clips securing the front panel in place. Look for any hidden fasteners and remove them before attempting to remove the panel.

Safety Precautions And Handling Fragile Parts:
Removing the front panel of a Samsung fridge drawer requires careful handling to prevent any damage or accidents. Keep these safety precautions in mind:
- Unplug the fridge: Before starting the removal process, unplug the refrigerator from the power source. This will eliminate any risk of electrical shock while working with the front panel.
- Wear protective gloves: To protect your hands from potential injuries or sharp edges, it is advisable to wear a pair of protective gloves. This will provide a better grip and reduce the risk of cuts or bruises.
- Use proper tools: Use the appropriate tools, such as a plastic pry tool or a flat-head screwdriver, to remove the front panel. Avoid using sharp or metal objects that could scratch or damage the panel or surrounding surfaces.
- Handle with care: Fridge front panels are often made of plastic or glass, making them prone to breakage. Handle the panel with care, avoiding any unnecessary force or sudden movements that could cause it to crack or shatter.
- Store removed parts safely: Once you remove the front panel, place it in a secure and stable location to prevent any accidental damage. Keep it away from children or pets, as they may accidentally knock it over or mishandle it.
Cleaning And Maintenance Of The Removed Front Panel:
After successfully removing the front panel from your Samsung fridge drawer, follow these cleaning and maintenance tips:
- Use mild detergent and water: Prepare a solution of mild detergent and water. Dampen a soft cloth or sponge with the mixture and gently wipe the front panel to remove any dirt or stains. Avoid using abrasive cleaners or scrub brushes that can scratch the surface.
- Dry it thoroughly: After cleaning, make sure to dry the front panel thoroughly to prevent any water spots or damage. Use a clean, dry cloth or towel to wipe away any moisture. Ensure that no liquid seeps into the electronic components or openings.
- Check for damages: While cleaning, inspect the front panel for any damages or cracks. If you notice any issues, consider contacting a professional technician for repair or replacement.
- Reinstall with care: When reinstalling the front panel, align it properly with the refrigerator’s frame and gently push it back into place. Make sure it fits snugly and securely without any loose or misaligned parts.
- Regular maintenance: To keep the front panel in good condition, establish a regular maintenance routine. Wipe it down regularly with a soft cloth or sponge to remove any dust or fingerprints. Avoid using harsh chemicals or abrasive materials that could damage the surface.

By following these troubleshooting tips, safety precautions, and cleaning guidelines, you can successfully remove, clean, and maintain the front panel of your Samsung fridge drawer. Remember to handle the parts delicately and take proper care to avoid any damage or accidents.
Frequently Asked Questions On How To Remove Samsung Fridge Drawer Front
How To Get The Front Plastic Piece Off My Samsung Refrigerator Crisper Drawer?
To remove the front plastic piece from your Samsung refrigerator crisper drawer, follow these steps:
1. Open the crisper drawer and locate the plastic piece at the front.
2. Gently push the plastic piece upwards or downwards to release it from its slots.
3. Once released, carefully pull the plastic piece towards you to remove it completely.
4. To reattach the plastic piece, align it with the slots on the crisper drawer and push it firmly until it snaps into place.
5. Make sure the plastic piece is securely attached before closing the crisper drawer.
Note: handle the plastic piece with care to avoid any damage or breakage.
How Do You Remove The Drawer From A Samsung Refrigerator?
To remove the drawer from your samsung refrigerator, follow these steps:
1. Open the refrigerator door completely.
2. Locate the drawer you want to remove.
3. Carefully pull the drawer out as far as it will go.
4. Lift the front of the drawer slightly to disengage the locking mechanism.
5. Continue pulling the drawer out until it is completely disconnected from the tracks.
6. Set the drawer aside in a safe place.
Remember, it’s important to be gentle when removing the drawer to avoid any damage. If you encounter any difficulties, consult the refrigerator’s user manual for specific instructions.
Properly removing the drawer will allow you to clean or rearrange the refrigerator interior as needed.
How Do You Remove The Flex Door On A Samsung Refrigerator?
To remove the flex door on a Samsung refrigerator:
1. Open the refrigerator door fully.
2. Locate the hinge cover at the top of the door.
3. Gently remove the hinge cover by pulling it off.
4. Unscrew the screws that secure the hinge to the door.
5. Lift the door and slide it off the bottom hinge pin.
6. Place the door on a flat and stable surface.
7. Remove the screws holding the handle to the door, if necessary.
8. Carefully lift the handle to detach it from the door.
9. Reverse these steps to reattach the flex door to the refrigerator.
Remember to handle the door with care and keep track of any screws or parts that you remove to ensure a smooth reinstall.
How Do I Remove The Drawer Front Of My Samsung Fridge?
To remove the drawer front of your Samsung fridge, you’ll first need to open the drawer completely. Look for the tabs or clips on each side of the drawer and push them inward. Once the tabs are pushed in, simply lift the drawer front off its track.
Conclusion
To sum up, removing the front drawer of your Samsung fridge may seem daunting at first, but with the right tools and steps, it can be a breeze. Start by ensuring you have the necessary tools and safety precautions in place, such as gloves and a flathead screwdriver.
Carefully follow the step-by-step process of disconnecting the drawer from the sliding rails, being mindful not to force anything or damage any components. Once detached, give the front drawer a thorough clean or replacement before reattaching it to the fridge.
This simple maintenance task can greatly improve the appearance and functionality of your fridge, ensuring a clean and organized space for your food storage needs. Remember, regular upkeep is essential to prolonging the life of your fridge and keeping it in top working condition.