Welcome to our comprehensive guide on how to remove ice dispenser cover on a Whirlpool refrigerator.
Have you ever found yourself struggling to access the ice dispenser or facing issues with the cover? You’re not alone. Many Whirlpool fridge owners encounter difficulties when it comes to removing the ice dispenser cover, but fret not!
In this article, we will unveil the secret techniques and step-by-step instructions to successfully remove the ice dispenser cover on your Whirlpool fridge, helping you overcome any obstacles along the way.
Whether you’re dealing with stuck screws or jammed covers, or simply want to perform regular maintenance, we’ve got you covered. Get ready to unlock the secrets and regain control of your ice dispenser like a pro!
Function And Design Of The Ice Dispenser Cover On Whirlpool Fridges
The ice dispenser cover on Whirlpool fridges serves an important function in maintaining the quality of ice and ensuring it remains free from contaminants. The cover is designed to seal the ice dispenser compartment, preventing any foreign particles from entering and contaminating the ice. This ensures that the ice is safe for consumption and free from any harmful bacteria.
The cover also helps to maintain the temperature of the ice and prevent it from melting or clumping together.
The design of the cover is sleek and modern, complementing the overall aesthetic of the fridge. It is easily removable for cleaning and maintenance, making it a practical and functional addition to any Whirlpool fridge.
Why Is It Necessary To Remove Ice Dispenser Cover On A Whirlpool Refrigerator?
Removing the ice dispenser cover on Whirlpool fridges may be necessary for a variety of reasons. Here are some possible scenarios:
- Cleaning: Over time, ice dispensers can accumulate dirt, debris, and even mold. Removing the cover allows for easy access to clean the interior parts thoroughly.
- Maintenance: If the dispenser is not functioning correctly, removing the cover can help diagnose the problem and make repairs more accessible.
- Replacement: If the dispenser cover is damaged or cracked, it may need to be replaced. Removing it is the first step in the replacement process.
- Upgrades: Some users may want to upgrade their dispenser, such as installing a new filter or adding a water dispenser. Removing the cover will allow access to the necessary parts for the upgrade.
It is important to follow the manufacturer’s instructions when removing the cover to avoid any damage to the appliance or injury to oneself.
Overall, removing the ice dispenser cover on Whirlpool fridges can help maintain and improve their functionality.
Preparing For The Removal Process
Gathering the necessary tools and materials, as well as taking some safety precautions, is always required before beginning any repair or maintenance work, such as removing the ice dispenser cover on your Whirlpool refrigerator.
Find out what safety rules you must follow and what materials or tools you will need to complete the job safely and efficiently below.
Safety Precautions To Follow
Before removing the ice dispenser cover on Whirlpool Fridges, it is important to take certain safety precautions to ensure that the process is performed safely and efficiently. Some of the safety precautions that you may require taking are as follows:
- Turn off the power supply to the fridge to avoid any electrical shock.
- Wear gloves to protect your hands from any sharp edges or debris that may be present.
- Use a flashlight to clearly see what you are doing and avoid any potential accidents.
- Use a screwdriver to remove the screws that hold the ice dispenser cover in place.
- Be gentle when removing the cover to avoid any damage to the dispenser or the fridge itself.
By following these safety precautions, you can ensure the safe and effective removal of the ice dispenser cover on Whirlpool Fridges.
Tools And Equipment Needed For The Task
Before attempting to remove ice dispenser cover on a Whirlpool refrigerator, it is important to gather the necessary tools and materials to ensure a safe and successful removal process.
The following is a list of tools and materials that may be required:
- Screwdriver – needed to remove screws on the dispenser cover
- Plastic putty knife – to gently pry off the cover
- Cleaning cloth – to clean the cover and surrounding area
- Gloves – to protect your hands during the removal process
- Replacement parts (if necessary) – such as the ice dispenser motor or control board
It is important to note that the specific tools and materials required may vary depending on the specific model of the Whirlpool fridge. It is always recommended to consult the user manual or seek professional assistance if unsure about the removal process.
Step-By-Step Guide To Remove Ice Dispenser Cover On A Whirlpool Refrigerator
We’re now ready to proceed to the main steps for removing the Whirlpool fridge’s ice dispenser cover. We’ve taken all necessary safety precautions and gathered all necessary tools and materials.
We also carefully read the manufacturer’s instructions to ensure that we didn’t make any mistakes. So, let’s get started on removing the ice dispenser step by step.
Step 1: Unplugging the Fridge and Turning Off the Water Supply
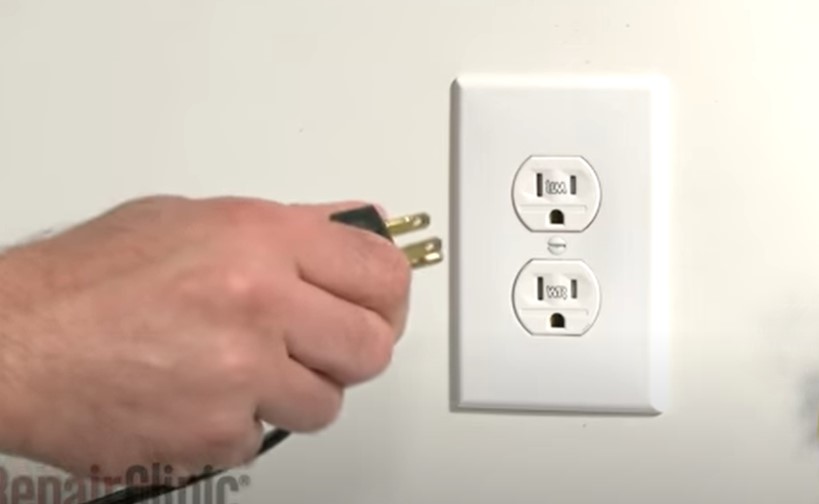
Before starting the removal process, ensure your safety by unplugging the Whirlpool fridge from the power source. Additionally, locate the water supply valve connected to the fridge and turn it off to prevent any potential leaks or water damage during the procedure.
Also, remove the drip tray to get access to the ice dispenser cover.
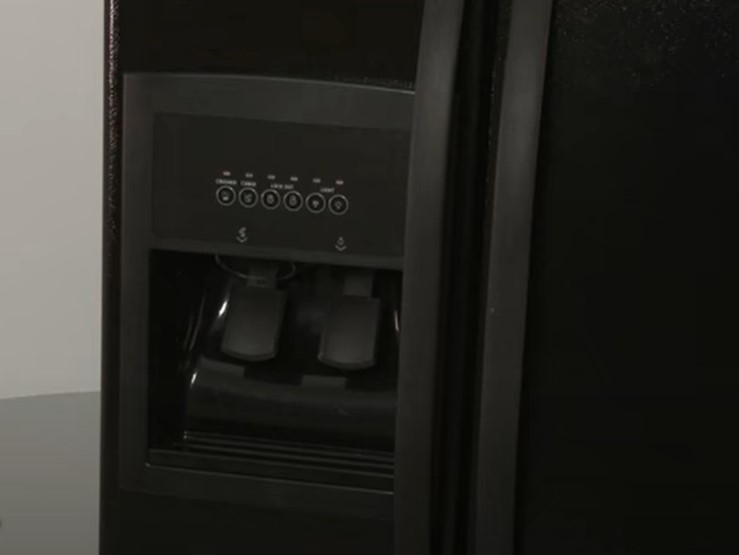
Step 2: Locating the Ice Dispenser Cover and Assessing Attachment Points
Take a close look at your Whirlpool fridge and identify the ice dispenser cover. It is typically located on the front of the refrigerator, near the ice dispenser opening.
Carefully examine the cover to determine how it is attached to the fridge. Look for screws, fasteners, or any other securing mechanisms that hold the cover in place.
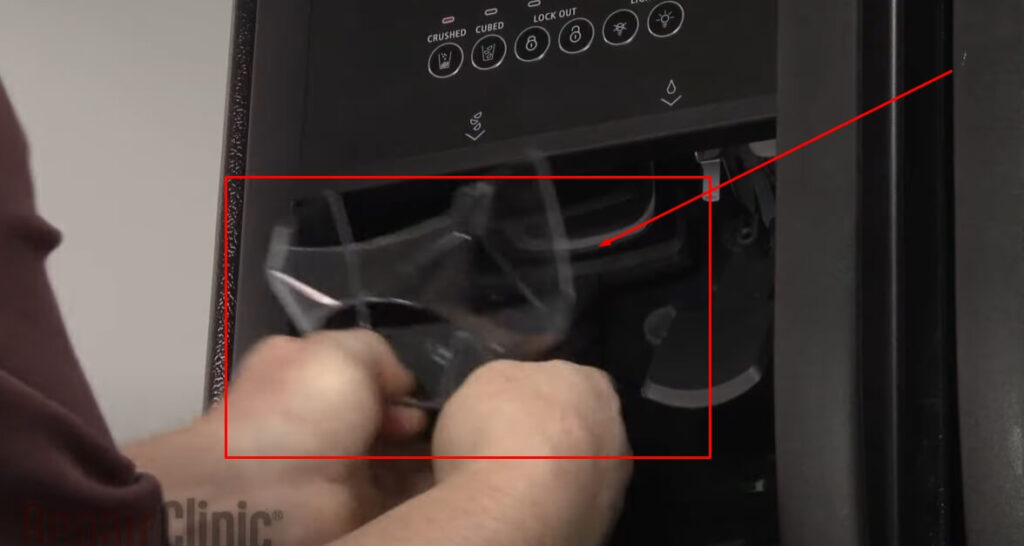
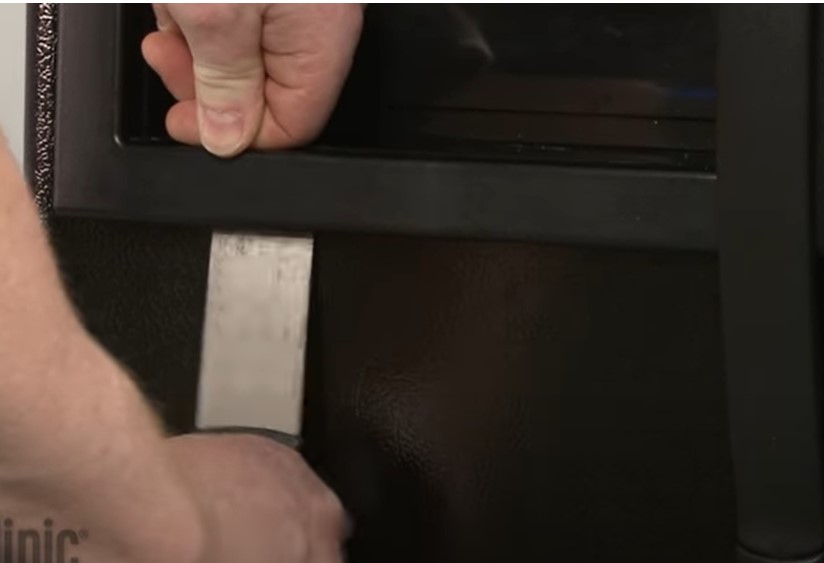
Based on the model of your refrigerator, you may need to insert a putty knife to uncover the ice dispenser face cover. See the picture below.
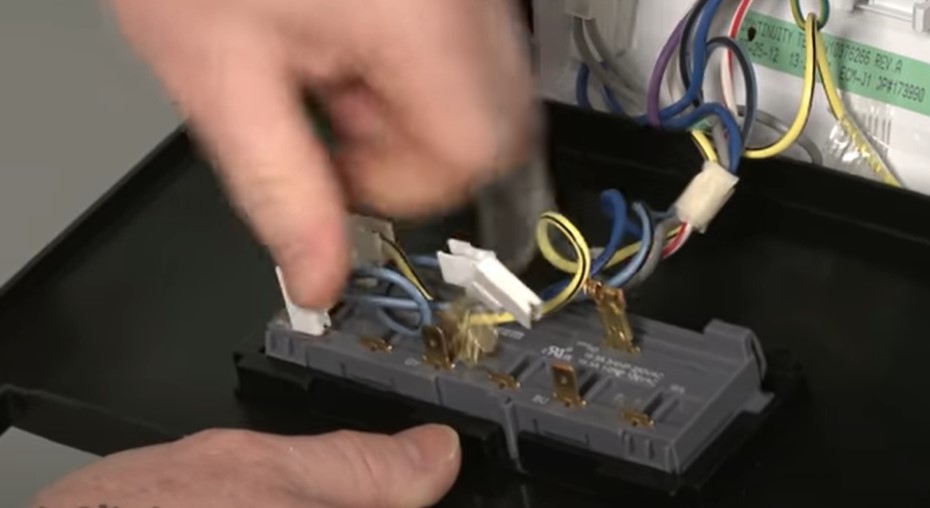
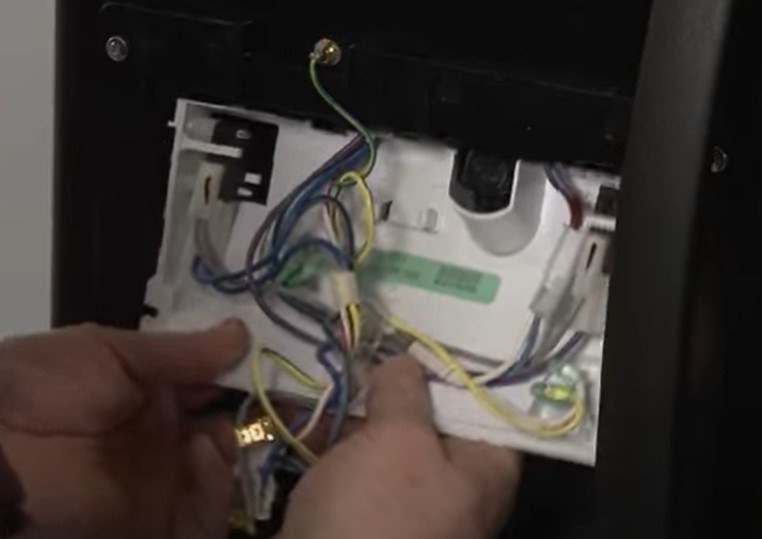
After removing the face cover, you will find the wire connection connected to the face panel. Note the connections and gently pull them upward with your fingers.
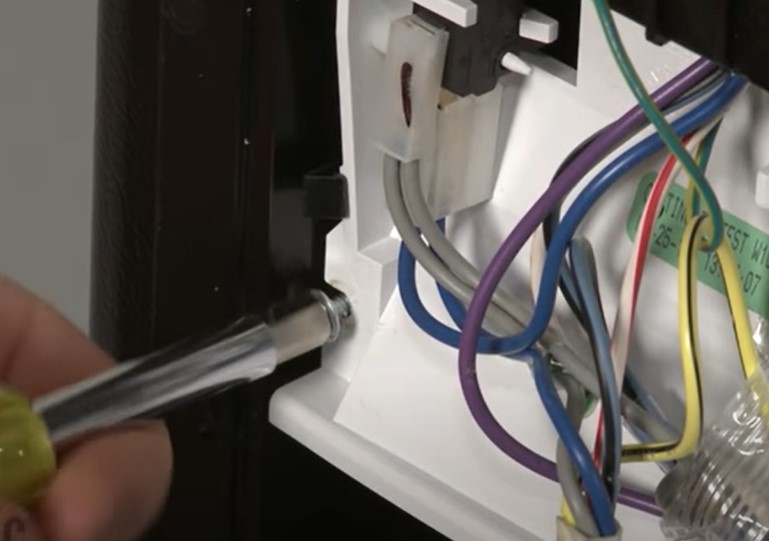
Step 3: Removing the Screws or Fasteners Holding the Cover in Place
Using the appropriate screwdriver or tool, carefully unscrew the screws or remove the fasteners that secure the ice dispenser cover to the fridge. Take note of the number and location of the screws or fasteners as you remove them. Place them in a secure location to avoid misplacement.

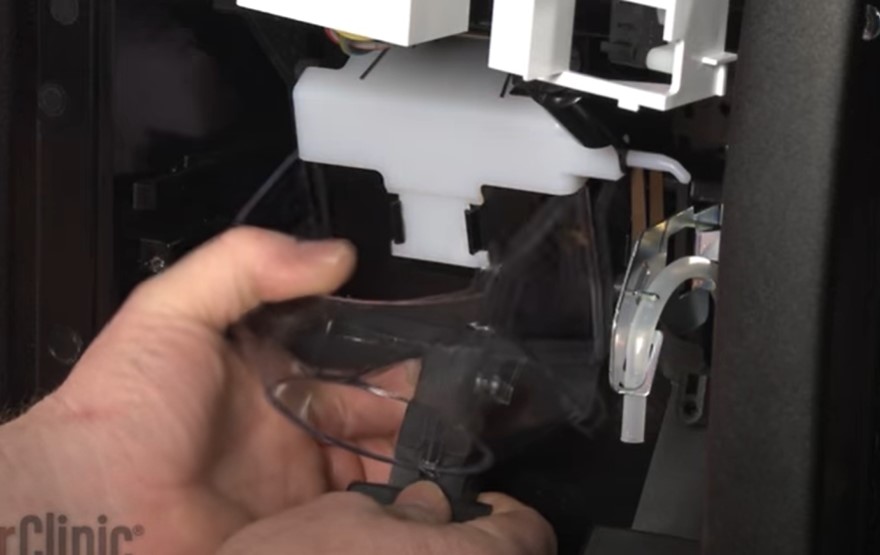
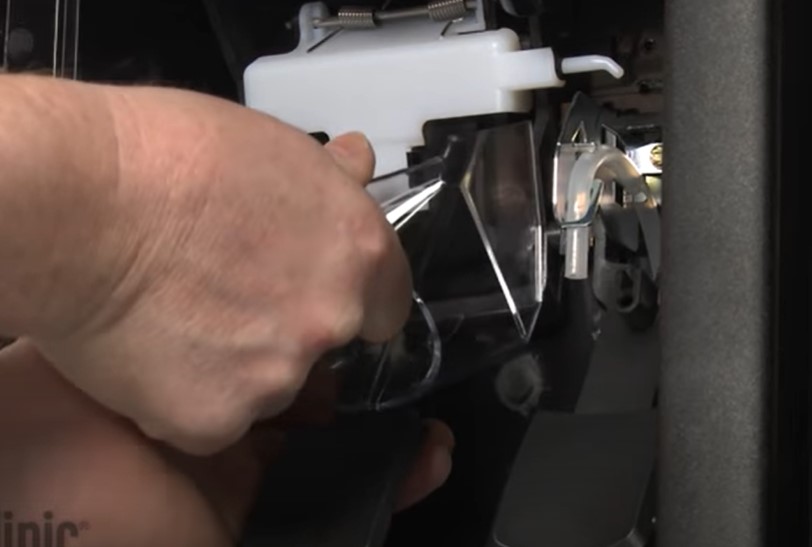
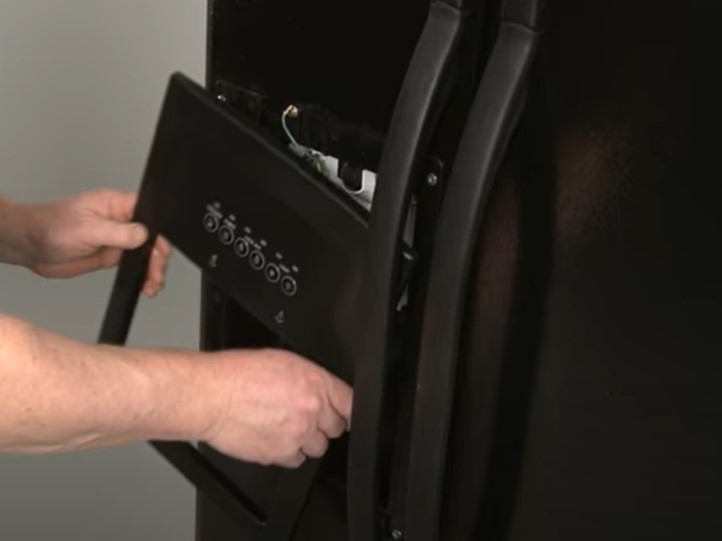
Step 4: Gently Detaching the Cover from the Fridge
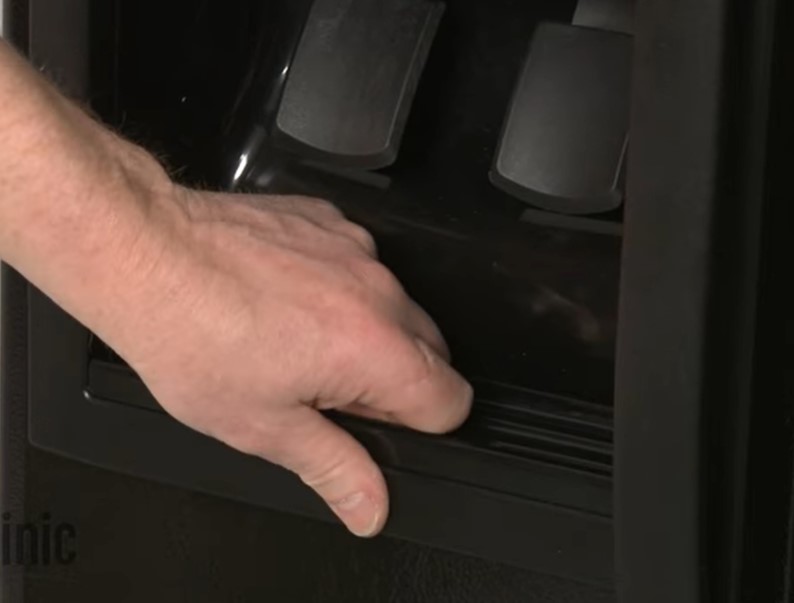
Once the screws or fasteners are removed, it’s time to detach the ice dispenser cover from the fridge. Apply gentle pressure or use your fingertips to carefully pry the cover away from the refrigerator.
Be cautious not to force it or use excessive pressure, as this could cause damage to the cover or the fridge itself.
Step 5: Cleaning and Inspecting the Cover
After successfully removing the ice dispenser cover, it’s a good idea to clean it thoroughly. Use a mild soap or detergent and warm water to wash away any dirt, residue, or buildup that may have accumulated over time.
Inspect the cover for any signs of damage, cracks, or wear and tear. If necessary, consider replacing the cover to maintain optimal functionality.
Congratulations! You have successfully removed the ice dispenser cover from your Whirlpool fridge. Now you can access the ice dispenser more easily for cleaning, maintenance, or troubleshooting purposes.
Remember to follow the next steps carefully for reinstallation or continue with any necessary repairs or cleaning tasks.
How To Reinstall The Ice Dispenser On A Whirlpool Refrigerator?
Once you remove ice dispenser on a Whirlpool refrigerator successfully and clean it or do necessary troubleshooting, it is time to reinstall it in place correctly.
To reinstall the ice dispenser on a Whirlpool refrigerator follow the steps below:
- First, remove the ice bin and dispenser cover.
- Next, disconnect the wiring harness and the water tubing from the dispenser.
- Then, remove the screws securing the dispenser to the refrigerator door.
- Carefully lift the dispenser out of the door and place it on a flat surface.
- To reinstall the dispenser, align it with the holes on the door and secure it with screws.
- Reconnect the wiring harness and water tubing to the dispenser.
- Finally, replace the dispenser cover and ice bin.
To reinstall the dispenser, align it with the holes on the door and secure it with screws.
Reconnect the wiring harness and water tubing to the dispenser.
After positioning the wiring harness, use a Phillips screwdriver to secure it with the same screws you removed.
Finally, replace the dispenser cover and ice bin.
Ensure the dispenser is properly aligned and functioning before use.
These steps should ensure a successful reinstallation of the ice dispenser on a Whirlpool refrigerator.
How to Clean Ice Dispenser Chute on Whirlpool Refrigerator?
Cleaning the ice dispenser chute on your Whirlpool refrigerator is an important step to ensure that you are getting clean and safe ice. To begin, turn off the water supply leading to the ice maker.
Next, take a vacuum cleaner with a brush attachment or use a soft cloth and mild detergent solution to gently scrub away any dirt or debris from inside the chute.
Rinse thoroughly with warm water and wipe dry before reinstalling it in its original position.
Finally, turn on the water supply again and run some fresh cold water through the chute for several minutes until all residue has been flushed out.
How to Remove Ice Dispenser from Whirlpool Refrigerator?
Removing the ice dispenser from your Whirlpool refrigerator is a fairly straightforward process.
- First, you will need to locate and remove any screws or fasteners that are holding the ice dispenser in place.
- Once this has been done, you can carefully pull out the entire unit from its housing.
- You may also want to disconnect any wiring or water lines that are connected to the back of the unit before removing it completely.
- Finally, you can then lift it off and set it aside for disposal or replacement with another unit if desired.
Whirlpool Ice Dispenser Flap Not Closing
If your Whirlpool ice dispenser flap isn’t closing properly, it could be a sign that the latch or switch is not working correctly. Check to make sure the latch is in good condition and that it’s operating smoothly. If the issue persists, you may need to replace this component with a new part from an authorized service provider.
Whirlpool Ice Maker Door Flap
The Whirlpool Ice Maker Door Flap is a convenient and easy-to-use feature that allows you to open and close the door of your ice maker with just one hand. This unique design makes it easier to access the ice when needed, while also helping to keep warm air out of the compartment.
The flap is made from durable plastic material that will stand up to regular use, ensuring it lasts for years in your kitchen appliance.
How to Remove Ice Dispenser Cover on a Frigidaire Refrigerator?
Removing the ice dispenser cover on a Frigidaire refrigerator is a simple task that requires just a few minutes.
First, locate the screws that hold the cover in place and unscrew them with either a screwdriver or an Allen wrench.
Once all of the screws are removed, carefully lift off the cover to reveal your ice dispenser.
For more detailed instructions or if you’re having trouble removing your ice dispenser cover, please consult your owner’s manual for assistance.
Whirlpool Refrigerator Dispenser Front Panel
The Whirlpool Refrigerator Dispenser Front Panel is a convenient way to access and dispense cold water or ice cubes directly from your refrigerator. It features an easy-to-use push button dispenser that allows you to control the flow of water easily without having to open up the door.
The panel also includes LED indicators for both ice cubes and filtered water, giving you an indication of when it’s time to change out filters or add more ice cubes.
This feature is perfect for busy households that need quick access to cold beverages!
How to Fix Ice Dispenser on Whirlpool Refrigerator?
If you are having trouble with the ice dispenser on your Whirlpool refrigerator, there are a few steps you can take to fix it. First, make sure that the ice bin is properly positioned in the freezer and that all of its electrical connections are firmly attached.
Also, ensure that the water pressure to the unit is adequate and check for any clogs or blockages in the water line.
If none of these issues resolve the problem, then you may need to replace some parts such as a new switch actuator or auger motor assembly.
How to Remove Whirlpool Water Dispenser Cover?
Removing the water dispenser cover on a Whirlpool refrigerator is an easy process that requires few tools. First, locate and remove the two screws from either side of the dispenser housing using a Phillips screwdriver. Then pull off the cover to expose the internal mechanism and controls.
Once you have access to these components, you can clean or repair them as needed before reattaching the cover with new screws. With just a few minutes of your time, your water dispenser will be back in working order!
How to Remove the Ice Maker Cover on a Whirlpool Refrigerator?
To remove the ice maker cover on a Whirlpool refrigerator, you will need to first locate the screws that hold the cover in place. There may be two or four screws holding it in place depending on your model of refrigerator. Once these screws have been removed, simply pull off the cover and discard it as necessary.
Note that there may also be a mounting bracket attached to the backside of this cover that needs to be unscrewed before removing it completely.
How Do You Remove the Dispenser Panel on a Whirlpool Refrigerator?
To remove the dispenser panel on a Whirlpool refrigerator, you must first open the freezer door and locate the screws that are holding the dispenser in place. You will need to use a Phillips screwdriver or other appropriate tool to loosen these screws.
Once all of the screws have been removed, gently pull away from the wall until it is disconnected from any wiring harnesses connected behind it.
Finally, lift off the panel carefully and set it aside for safekeeping until reattachment is necessary.
Whirlpool Refrigerator Replace Dispenser Funnel Guide [Video]
How Do You Disassemble a Whirlpool Ice Dispenser?
To disassemble a Whirlpool ice dispenser, start by unplugging the unit and removing any screws that secure the cover.
Then, carefully pull off the cover to expose the internal components of the machine. Next, locate and remove the motor assembly from its mounting bracket.
Once this is done, you should be able to access all other parts such as levers, switches, augers, and reservoirs which can then be removed one at a time with a screwdriver.
Finally, use pliers or an adjustable wrench to disconnect any electrical wiring before completely dismantling each individual part for cleaning or repair work.
How Do You Remove Ice Dispenser Chute?
Removing an ice dispenser chute from a refrigerator can be done in just a few steps. First, locate the screws that hold the ice dispenser chute in place and remove them with a screwdriver. Then, gently pull the chute out of its housing on the fridge door or freezer wall.
Finally, disconnect any electrical connections that are attached to the chute before fully removing it from your appliance. After you have removed all parts of the old ice dispenser chute, you may then install a new one following these same steps in reverse order.
How often should I remove and clean the ice dispenser cover?
As a general rule of thumb, it is recommended to remove and clean the ice dispenser cover at least once a month. However, the frequency of cleaning may depend on the usage and environment of the dispenser.
If the dispenser is used frequently or is located in a dusty environment, it may require more frequent cleaning. It is important to remove any buildup of ice or debris to prevent contamination of the ice.
Regular cleaning also helps to maintain the efficiency and performance of the dispenser. It is recommended to refer to the manufacturer’s instructions for specific cleaning guidelines and procedures.
Are there any specific cleaning products I should use on the Ice Dispenser Cover?
When it comes to cleaning the ice dispenser cover, it is important to use cleaning products that are safe for the material and will not damage it. It is recommended to use mild soap and water to clean the cover, as harsh chemicals can cause discoloration and other damage.
It is also important to avoid using abrasive sponges or scrubbers, as they can scratch the surface of the cover.
In addition, it is a good practice to regularly wipe down the cover with a dry cloth to prevent any buildup of dirt or grime.
By using gentle cleaning methods and products, you can ensure that your ice dispenser cover remains in excellent condition and continues to function properly.
Conclusion
In conclusion, removing the ice dispenser cover on a Whirlpool refrigerator might seem like a daunting task at first, but with this step-by-step guide, it can be done with ease. By following the instructions outlined above, you can safely remove the ice dispenser cover without causing any damage to your refrigerator.
Remember to handle all the parts carefully and take note of their placement for easy reassembly.
With a little patience and some basic tools, you can successfully remove the ice dispenser cover in no time and get your refrigerator back to working efficiently.