Hey there Whirlpool refrigerator owners, are you ready to keep your ice bin clean and in tip-top shape? But hold up, if you’re scratching your head on how to remove ice bin from Whirlpool French door refrigerator, we’ve got your back! It’s super important to keep that bin clean for the proper functioning of your fridge.
Trust us, no one wants clogged drain lines or leaky dispensers messing with their ice.
Whether you want to clean the ice bin, refill it or need to troubleshoot an issue, knowing how to remove it is essential. In this post, we’ll be sharing some simple tips that will guide you on how to remove the ice bin with ease, without causing any damage.
So, let’s get those bins removed like a pro and ensure your fridge is running smoothly!
How to remove ice bin from whirlpool side by side refrigerator?
To remove an ice bin from a Whirlpool side-by-side refrigerator, follow these steps:
- Open the freezer door and locate the ice bin.
- Lift the ice bin up and out of the freezer compartment.
- If the ice bin is stuck, try gently wiggling it back and forth to free it.
- Once the ice bin has been removed, you can clean it with mild soap and water.
- Rinse the ice bin thoroughly and dry it completely with a clean towel.
- To replace the ice bin, simply slide it back into the freezer compartment.
- Make sure that the ice bin is properly seated in the freezer compartment before closing the door.
Why Is It Necessary To Remove Ice Bin From Whirlpool French Door Refrigerator?
The ice bin in your Whirlpool French Door Refrigerator plays a crucial role in storing and dispensing ice. However, there are instances when removing the ice bin becomes necessary.
Here, we will explore the reasons why removing the ice bin is important for the overall functionality, cleanliness, and maintenance of your refrigerator.
Preserving the Freshness and Quality of Ice:
To ensure the freshness and quality of the ice produced by your refrigerator, it is necessary to remove the ice bin periodically. Over time, ice can develop an unpleasant taste or odor due to the absorption of odors from other food items in the freezer.
By removing the ice bin, you can discard any remaining ice and clean the bin thoroughly, eliminating any potential contaminants that could affect the taste and quality of your ice.
Preventing Ice Jam and Dispensing Issues:
Ice bins can sometimes become jammed, leading to difficulties in dispensing ice. Removing the ice bin allows you to inspect and address any potential issues that may cause ice to get stuck. This includes checking for ice blockages, misaligned mechanisms, or foreign objects obstructing the ice dispenser.
Regular removal of the ice bin helps prevent such problems and ensures smooth and hassle-free ice dispensing.
Cleaning and Maintenance Purposes:
The ice bin, being a frequently used component of your refrigerator, requires regular cleaning and maintenance. Over time, mineral deposits and residue from melted ice can accumulate in the bin, affecting its cleanliness and functionality.
By removing the ice bin, you gain access to clean and sanitize it properly. This helps eliminate any buildup, mold, or bacteria that may have formed, ensuring a hygienic environment for your ice storage.
Additionally, you will get the opportunity to inspect other parts of the ice-making system by removing the ice bin. You can check for any signs of wear and tear, such as cracked or damaged components and address them promptly.
Regular maintenance and cleaning of the ice bin contribute to the longevity and optimal performance of your Whirlpool French Door Refrigerator.
Preparing Your Whirlpool French Door Refrigerator for Ice Bin Removal
Gather the Necessary Tools and Materials
Before beginning the process of removing the ice bin from your Whirlpool French door refrigerator, it is important to gather all the necessary tools and materials to ensure a smooth and safe process.
The tools required for this task include:
- A Phillips head screwdriver,
- A flathead screwdriver,
- A pair of pliers,
- A pair of gloves,
- A Bucket, and
- Clean cloth and soap
Additionally, it is recommended to have a clean cloth and a bucket nearby to catch any water that may spill during the removal process.
It is also important to turn off the water supply to the refrigerator and unplug it from the wall before starting.
By gathering all the necessary tools and materials beforehand, you can ensure a successful and efficient removal of the ice bin.
Turn off the Ice Maker
To turn off the ice maker before removing the ice bin from your Whirlpool French Door Refrigerator, follow the steps below:
- Start by locating the power switch or lever that controls the ice maker. This can usually be found on the side or back of the refrigerator.
- Once you have located the switch, turn it off by flipping it to the off position or pushing the lever to the off position.
- Wait a few minutes to ensure that the ice maker has fully shut down before attempting to remove the ice bin.
This will prevent any potential damage to the ice maker or the refrigerator and ensure the safe removal of the ice bin.
Emptying the Ice Bin
Before removing the ice bin from your Whirlpool French Door Refrigerator, it is essential to take proper steps to empty the ice bin.
- First, ensure that the ice maker is turned off and the freezer compartment is closed.
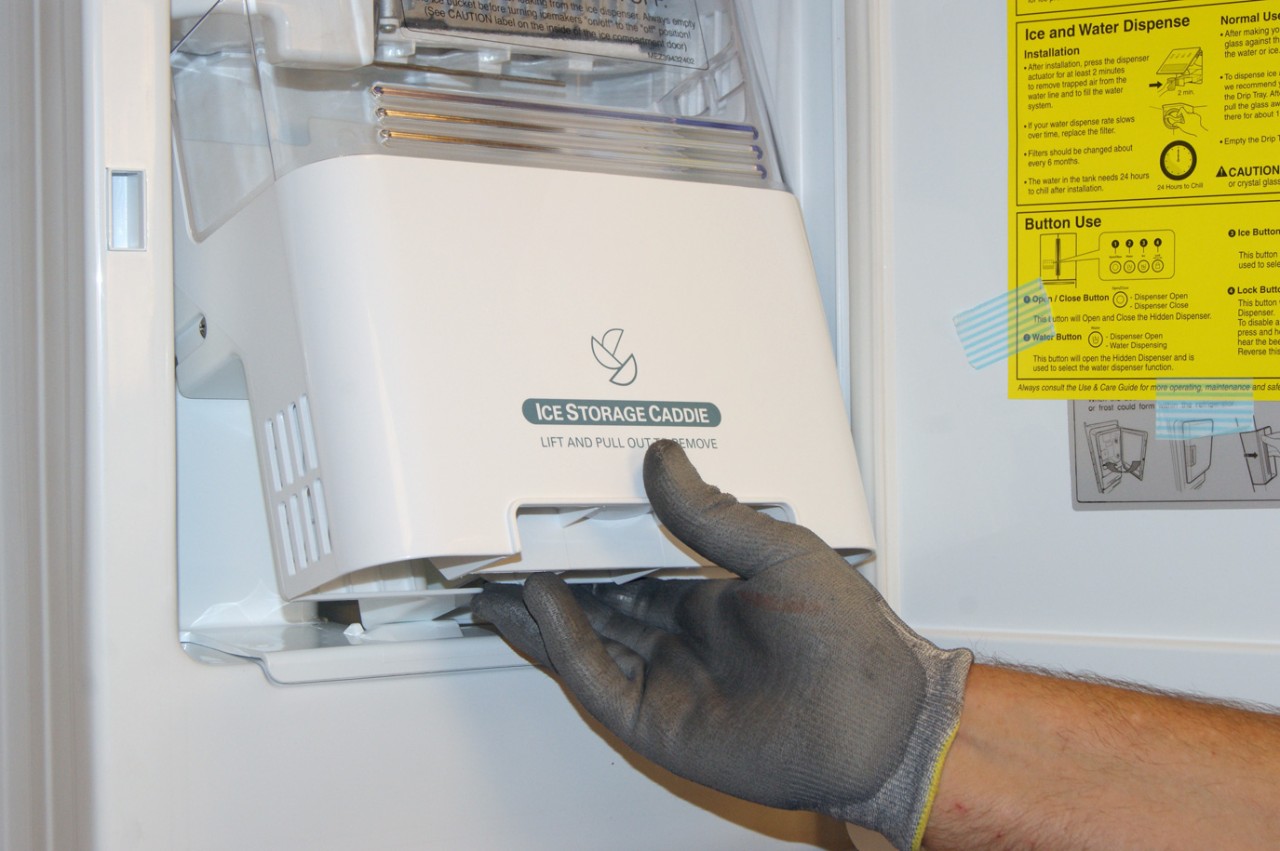
- Next, Place your fingers into the two front corners of the bin and gently pull it out from its storage location in your freezer.
- Then gently tilted the bin forward to empty any remaining ice cubes.
- Finally, check and remove any excess debris or frost that may have accumulated in the ice bin or on the surrounding components.
Once you emptying the ice bin, you are ready to move to the next steps. Let’s follow the steps below.
Step-by-Step Instructions for Removing the Ice Bin from a Whirlpool French Door Refrigerator
Removing the ice bin from your Whirlpool French Door Refrigerator is necessary to maintain the freshness and quality of the ice, to avoid ice jams and dispensing issues, and for cleaning and maintenance.
Whatever the reason for removing the ice bin, it is critical that you do so correctly to ensure that your refrigerator continues to produce clean and great-testing ice while also avoiding any potential ice dispensing issues.
As a result, follow the simple instructions below to remove the ice bin from a Whirlpool French door refrigerator.
Step 1: Unplug the refrigerator:
Before attempting to remove the ice bin, unplug the power cord of your Whirlpool French Door Refrigerator from its electrical outlet.
This will ensure that you do not accidentally electrocute yourself while removing the ice bin.
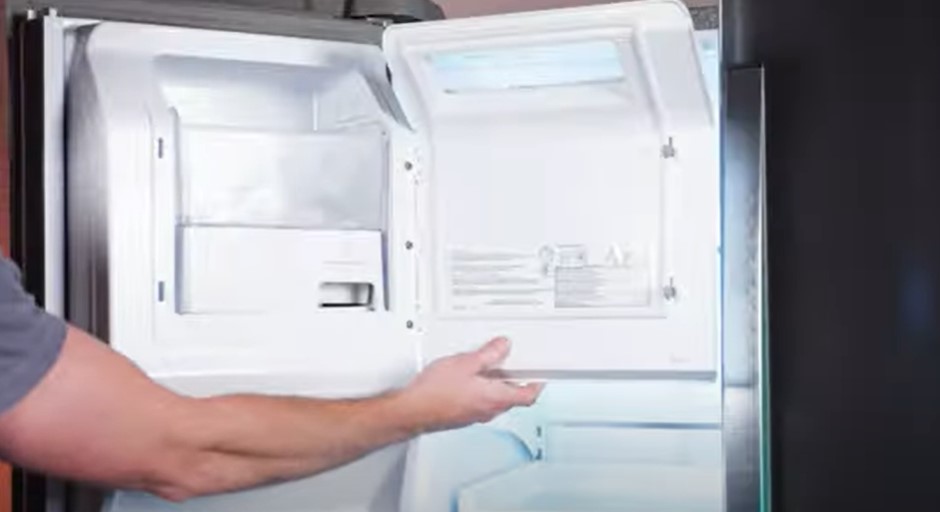
Step 2: Open both doors:
To access the ice bin, you need to open both of your refrigerator’s doors at once so that they are in line with each other and can be opened as wide as possible

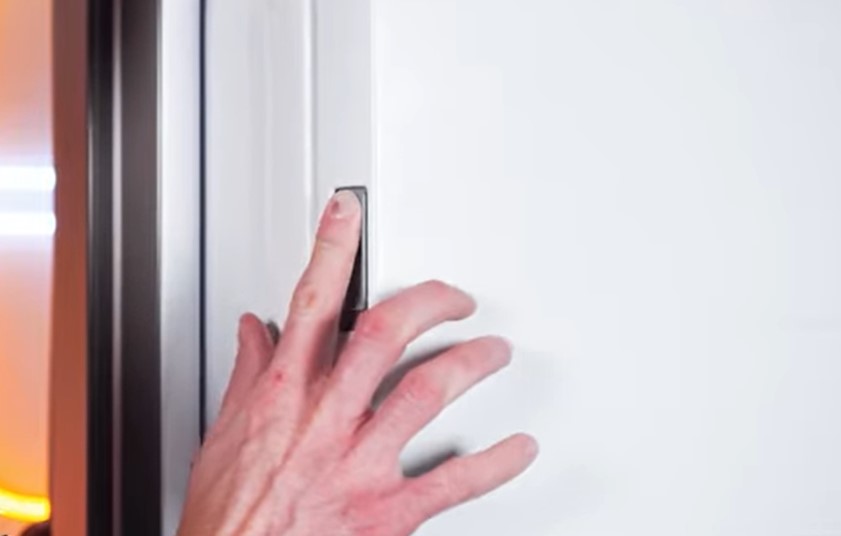
Step 3: Locate the latch release button:
The latch release button is usually located on top of or near one side of your refrigerator’s control panel inside one of its doors (it may vary depending on the model)
Push this button and hold it down for a few seconds until you hear a clicking sound indicating that it has been released from its locked position
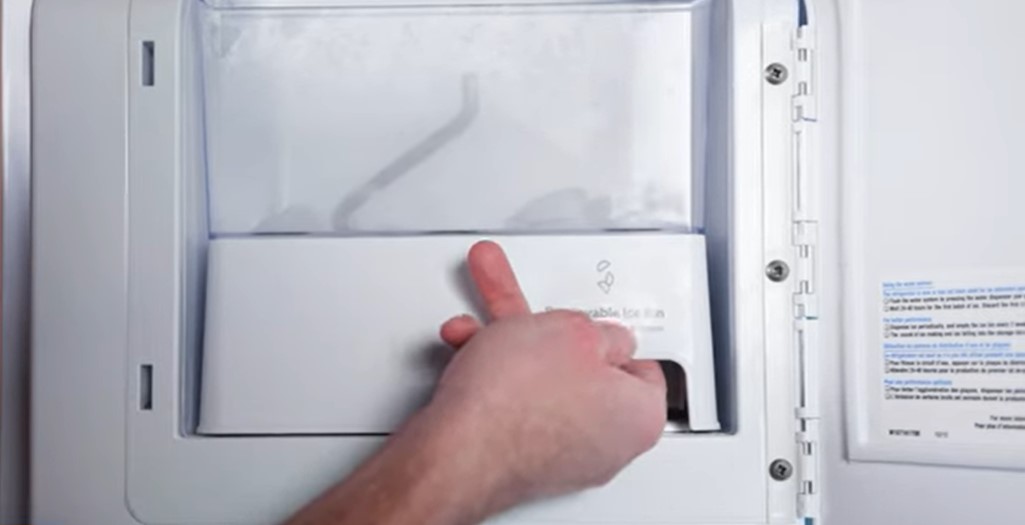
Step 4: Pull up on the ice bin lever:
Pull up firmly on either side of your ice bin lever after pressing and holding down the latch release button. While lifting slightly upward towards yourself until it completely unlocks from its housing within the door frame area of your Whirlpool French Door Refrigerator.
Step 5: Slide out Ice Bin:
Once unlocked, slide out the entire unit by grasping onto either side securely and pulling outward away from itself until fully removed from within your appliance’s interior cavity.
It’s all done. You can now proceed with the cleaning and maintenance of the ice bin to ensure the long-term and optimal operation of your Whirlpool French Door Refrigerator.
How to Replace the Whirlpool Refrigerator Ice Bin Old Model [Video]
Cannot Remove Ice Bucket from Whirlpool Refrigerator
If you have a Whirlpool refrigerator and are having difficulty removing the ice bucket, try turning off the power to the unit for 15 minutes. This will reset the mechanisms inside that may be causing it to get stuck.
If this doesn’t work, try lightly tapping on either side of the ice bucket as you pull it out, or use a flat-head screwdriver or butter knife to gently pry it loose if necessary.
Be sure not to apply too much pressure when doing so in order to avoid damaging any components within your refrigerator.
How to Remove Ice Tray from Whirlpool Side by Side Refrigerator?
Removing an ice tray from a Whirlpool side by side refrigerator is relatively straightforward. First, open the freezer and locate the ice-maker unit on the interior wall of the freezer. Then, press down on both sides of the cube bin and lift it away from its base – this should allow you to pull out one or all of the ice trays.
Once removed, you can either discard any accumulated cubes or use them for your next beverage!
Whirlpool In-Door Ice Container
The Whirlpool In-Door Ice Container is a revolutionary new way to store and dispense ice. This product features an extra-large capacity interior that can hold up to six pounds of ice and provides easy access from the outside of the refrigerator. The innovative design also includes a built-in bin for storing additional items like fruits or vegetables.
With its sleek, modern styling and space-saving capability, this unique in-door container provides convenient storage options while adding an attractive touch to any kitchen decor.
Whirlpool Ice Bucket Assembly
Replacing the ice bucket assembly in a Whirlpool refrigerator is a fairly straightforward process. First, remove the front panel from the inside of your freezer door and locate the old ice bucket assembly. Next, unplug any electrical connections attached to it.
Carefully lift out the old assembly and replace it with your new one before reattaching any wiring or plugs you have disconnected during disassembly. Finally, secure the new assembly into place within your freezer door and replace its front panel for safe storage of all your frozen items!
Whirlpool Removable Ice Bin Replacement
Replacing the ice bin in your Whirlpool refrigerator is an easy task that can be completed with minimal tools. Depending on your model, you may need to purchase a replacement ice bin from an appliance store or online retailer.
Once you have the new part, simply remove the old one by pressing in on both sides and pulling it out of its slot.
Then slide the new one into place until it clicks into position and you’re ready to go!
Whirlpool Removable Ice Bin W10347100
The Whirlpool Removable Ice Bin W10347100 is a great addition to any kitchen! This sturdy and reliable ice bin fits most side-by-side refrigerators, making it easy for you to store all your extra frozen food. The removable bin features an adjustable divider that allows you to customize the size of each compartment according to your needs.
Plus, this durable plastic model won’t rust or corrode over time, ensuring years of dependable use. With its simple installation process and convenient design, the Whirlpool Removable Ice Bin W10347100 is perfect for keeping your refrigerator organized and efficient!
How do you remove the ice bin on a whirlpool refrigerator?
To remove the ice bin on a Whirlpool refrigerator, follow these steps:
- Open the refrigerator door and locate the ice bin.
- Grasp the ice bin with both hands and lift it straight up.
- Carefully pull the ice bin out of the refrigerator.
- If necessary, you can remove the ice bin lid by grasping it on either side and lifting it up.
How to Put Ice Tray Back in Whirlpool Refrigerator?
Putting an ice tray back into your Whirlpool refrigerator is a quick and easy process. To get started, locate the ice maker compartment in the freezer section of your refrigerator. Then, insert the ice tray vertically with its handle facing up.
Finally, slide it all the way to the back until you hear a click that indicates it has locked into place. You’re now ready to enjoy fresh cubes of ice!

How to Remove Ice from Whirlpool Freezer?
Removing ice from a Whirlpool freezer can be done easily with just a few simple steps. Start by unplugging the power cord of your freezer, then take out all food and items stored inside.
Next, use a hairdryer to melt the ice build-up on the walls and shelves of your freezer.
Once melted, wipe away any remaining water with a clean cloth or sponge before drying off thoroughly.
Finally, plug in the power cord again and turn on your unit – you should now enjoy an icy-free Whirlpool Freezer!
How Do You Remove the Ice Maker on a Whirlpool French Door?
Removing the ice maker from a Whirlpool French door refrigerator is not difficult and can be completed in just a few steps.
First, you will need to locate the screws on either side of the ice maker that secures it to the interior wall. Once these screws have been loosened, carefully pull the ice maker out of its slot and set it aside.
Next, disconnect any wires or water tubes connected to the back of the unit before unscrewing any remaining mounting hardware until all components can be removed from your refrigerator.
Finally, you should use a damp cloth to wipe away any moisture or debris left behind by removing your old ice maker before installing your new one in its place following manufacturer instructions.
How Do You Remove a Stuck Ice Bin?
To remove a stuck ice bin, start by unplugging your refrigerator from the wall. Then, use a hair dryer or hot air gun to heat up the sides of the ice bin. This will help to loosen any frozen material that is causing it to stick in place.
If this doesn’t work, you can try using an old butter knife and carefully running it around all four edges of the ice bin. Once you’ve loosened all four corners, lift straight up on the bin until it pops out of place.
Finally, clean off any debris left behind before placing your new ice bin into place and plugging your fridge back in again!
How Do You Remove an Ice Bin from a Refrigerator?
Removing an ice bin from a refrigerator is a fairly simple process.
First, locate the two release tabs or buttons located on either side of the ice bin. Use your fingers to press down on each button while pulling outward on the bin until it releases from its holder.
If necessary, use both hands to pull apart and remove the ice bin completely from your fridge.
After removal, you can now access any components below that may need maintenance or cleaning. Be sure to place any food stored in the ice bin in another area before proceeding with repairs.
How to Remove the Ice Maker Cover on a Whirlpool Refrigerator?
Removing the ice maker cover on a Whirlpool refrigerator is fairly straightforward and can be completed in just a few steps. First, you will need to unplug your fridge from the wall or turn off the power at the circuit breaker. Once that has been done, locate the screws securing the ice maker cover on either side of it and remove them using a screwdriver.
You may also have to remove any other fasteners such as plastic clips or plastic tabs before being able to slide off the cover completely.
Finally, lift out any wires connected to the inside components of your fridge so they are not damaged during removal, and set them aside until you reassemble everything later.
Conclusion
Removing an ice bin from a Whirlpool French Door Refrigerator is relatively simple, and can be done with minimal effort.
With the right tools and knowledge of where to locate the screws, you can easily remove your refrigerator’s ice bin for cleaning or replacement. Taking on this task yourself will save time and money in the long run.