If your ice maker in the Whirlpool Gold refrigerator is not working properly, it can be frustrating, especially during hot summer days. Ice makers are essential appliances that provide convenience and ease of use when it comes to keeping your drinks cold.
However, when they malfunction, it can be challenging to fix them without the right expertise.
In this blog post, we will guide you on how to repair ice maker in Whirlpool Gold refrigerator efficiently and effectively.
How The Ice Maker Works?
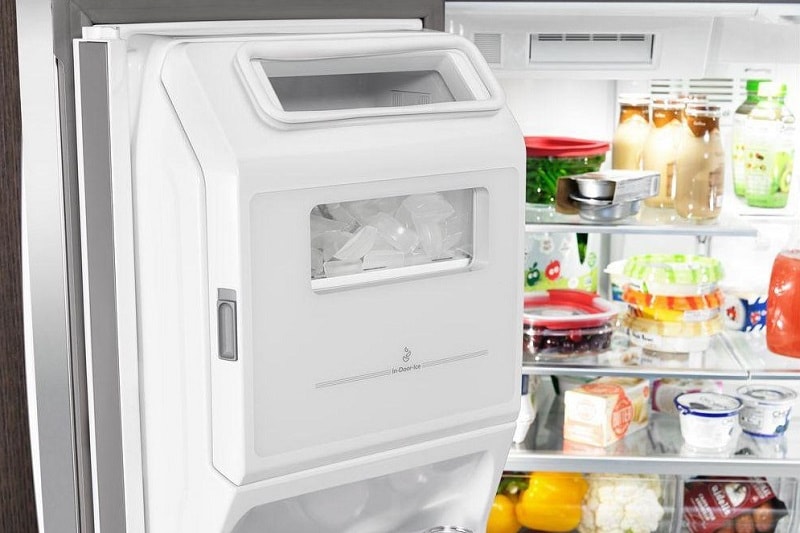
The ice maker in a whirlpool gold refrigerator operates by freezing water into ice cubes, which are then dispensed through a chute into a collection bin in the freezer.
If you encounter any issues with your ice maker, repairing it may involve troubleshooting the water supply, checking the cooling system, or replacing faulty components.
The ice maker in your whirlpool gold refrigerator is a complex system that produces ice cubes efficiently and reliably. Understanding how it works can help you troubleshoot and repair any issues that may arise.
Here’s a breakdown of the components and the step-by-step process involved in making ice:
Components Of The Ice Maker:
- Water supply line: Delivers water to the ice maker for ice production.
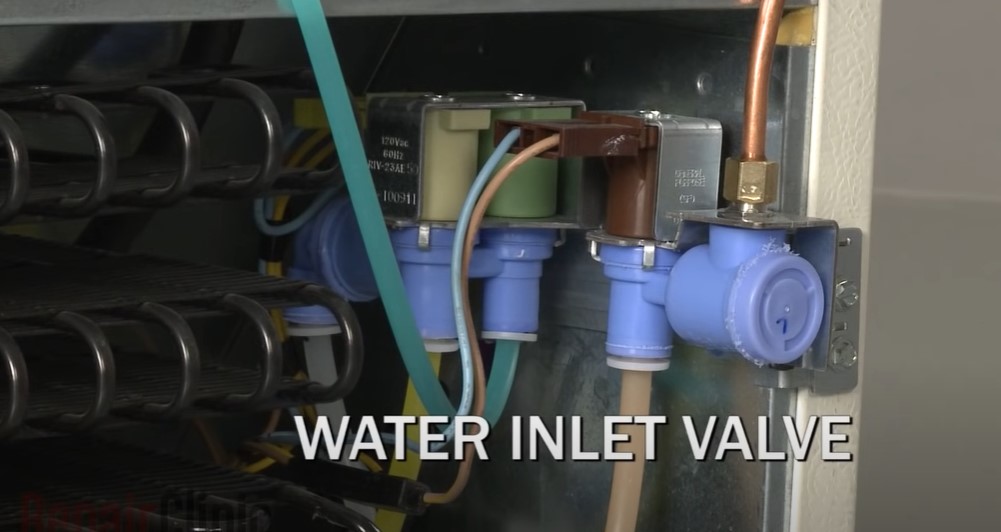
- Water inlet valve: Controls the flow of water into the ice maker.
- Ice mold: Holds the water and provides the shape for the ice cubes to form.
- Ice mold thermostat: Monitors the temperature inside the ice mold and signals the ice maker to initiate the ice-making process.
- Motor and gears: Drive the various mechanical functions of the ice maker.
- Heater: Loosens the ice cubes from the mold, allowing them to be released into the ice bin.
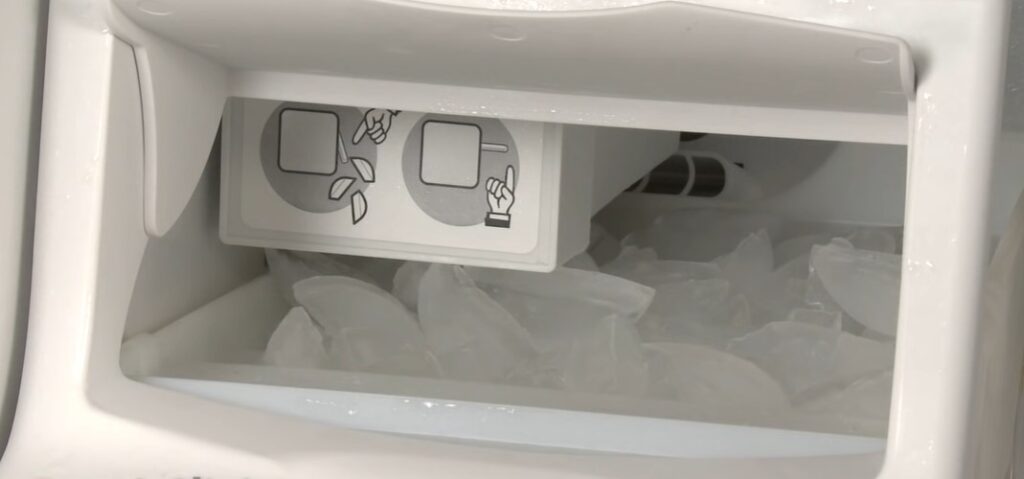
- Ice bin: Stores the ice cubes until they are ready to be dispensed.
Step-By-Step Ice-Making Process:
- The ice maker receives a signal from the ice mold thermostat that the temperature is suitable for ice production.
- The water inlet valve opens, allowing water to flow into the ice maker’s mold.
- The motor and gears drive a rotating mechanism that distributes the water evenly across the mold, filling the individual compartments.
- As the water freezes, the temperature inside the ice mold drops. The ice mold thermostat senses this and signals the ice maker to activate the heater.
- The heater warms the bottom of the ice mold, loosening the ice cubes from the mold’s surface.
- The motor and gears then rotate a harvesting arm, pushing the ice cubes out of the mold and into the ice bin below.
- Once the ice bin is full, a metal arm senses the level of the ice and signals the ice maker to pause ice production.
- When the ice in the bin is dispensed or melts, the metal arm drops, allowing the ice maker to resume ice production.
Understanding the components and step-by-step process of your whirlpool gold refrigerator’s ice maker can help you diagnose and repair any potential issues. By following these simple steps, you’ll be well-equipped to keep your ice maker running smoothly and efficiently.

Diagnosing Common Issues
Discover easy troubleshooting steps to repair the ice maker in your whirlpool gold refrigerator. Diagnose and fix common issues to ensure your ice maker is working efficiently again.
Identifying Common Ice Maker Problems
Ice makers are a convenient feature of whirlpool gold refrigerators, but they can sometimes encounter issues that prevent them from producing ice. If your ice maker is not functioning properly, there are a few common problems that you can diagnose to identify the issue.
Here are the steps to troubleshoot and identify the problem:
- No ice production: If your ice maker is not producing any ice, there are a few potential causes.
- Water supply issues: Check if the water supply line to the refrigerator is connected and not kinked or blocked.
- Freezer temperature: Make sure the freezer is set to the proper temperature, ideally between 0 to 5 degrees fahrenheit (-18 to -15 degrees celsius).
- Ice maker switch: Ensure that the ice maker switch is turned on and not accidentally switched off.
- Slow ice production: If your ice maker is producing ice, but at a slow rate, consider the following possibilities:
- Water pressure: Check the water pressure to the refrigerator. Low water pressure can result in slow ice production.
- Freezer temperature: Verify that the freezer is maintaining the recommended temperature range for efficient ice formation.
- Small or misshapen ice cubes: If your ice cubes are coming out small or misshapen, the problem may lie with:
- Water filter: A clogged or dirty water filter can affect the quality and shape of the ice cubes. Consider replacing the water filter if it has not been changed recently.
Troubleshooting Steps To Identify The Issue
To troubleshoot and identify the problem with your whirlpool gold refrigerator’s ice maker, follow these steps:
- Check the water supply:
- Ensure that the water supply line is properly connected to the refrigerator.
- Inspect the water supply valve to ensure it is open and allowing water flow.
- Verify that the water supply line is not kinked, bent, or blocked.
- Examine the ice maker:
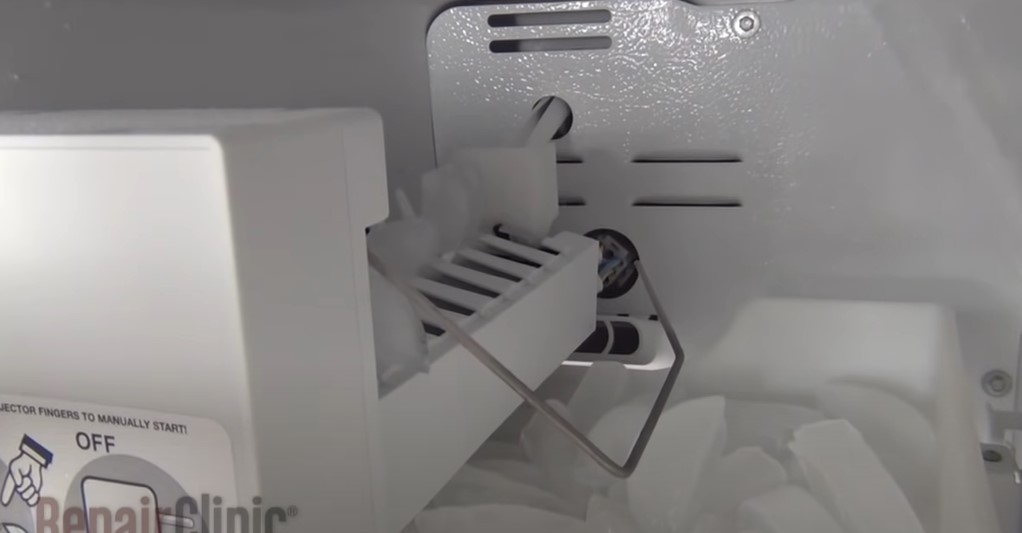
- Locate the ice maker unit inside the freezer compartment.
- Check if the ice maker is turned on. Look for an on/off switch or lever.
- Inspect the ice maker for any visible signs of damage or obstruction.
- Test the ice maker components:
- Check the water inlet valve for any blockages or malfunctions.
- Inspect the ice maker’s fill tube for ice blockages or frozen water.
- Test the ice maker’s motor and thermostat for proper functioning.
- Reset the ice maker:
- Try resetting the ice maker by turning it off, waiting a few minutes, and turning it back on.
- Consult the refrigerator’s user manual for specific instructions on how to reset the ice maker.
- Monitor ice production:
- After troubleshooting and potential fixes, monitor the ice maker’s performance.
- Observe if ice production resumes or improves.
Following these troubleshooting steps should help you identify the issue with your whirlpool gold refrigerator’s ice maker. By addressing the root cause of the problem, you can restore proper ice production and enjoy the convenience of an efficient ice maker once again.
Replacing Faulty Parts
Learn how to repair the ice maker in your whirlpool gold refrigerator by replacing faulty parts. Get your ice maker working again with these step-by-step instructions.
Necessary Tools And Materials:
- Flathead screwdriver
- Phillips screwdriver
- Adjustable wrench
- Replacement ice maker
- Replacement water inlet valve
- Replacement ice maker thermostat
To successfully replace faulty parts in your whirlpool gold refrigerator’s ice maker, you will need a few essential tools and materials. Gather the following before you begin:
Step-By-Step Guide To Replacing Specific Parts:
If your whirlpool gold refrigerator’s ice maker is malfunctioning, you may need to replace certain parts to restore its functionality. Follow these simple steps to replace the ice maker motor, water inlet valve, and ice maker thermostat:
Ice Maker Motor:
- Begin by disconnecting the refrigerator from the power source to ensure your safety.
- Locate the ice maker motor, usually located behind the refrigerator’s ice maker assembly.
- Using a phillips screwdriver, remove the screws securing the cover or panel that protects the motor.
- Carefully disconnect the wiring harness from the motor by gently pulling it away.
- Use a flathead screwdriver to remove any additional screws securing the motor in place.
- Once the screws are removed, carefully pull out the old ice maker motor.
- Replace it with a new ice maker motor, ensuring it is properly aligned.
- Secure the motor in place by tightening the screws with a phillips screwdriver.
- Reconnect the wiring harness to the new motor.
- Restore power by plugging the refrigerator back in.

Water Inlet Valve:
- Before starting, remember to unplug the refrigerator from the power source.
- Locate the water inlet valve at the back of the refrigerator, usually connected to the water supply line.
- Use an adjustable wrench to disconnect the water supply line from the valve.
- Remove any screws or brackets securing the valve to the refrigerator.
- Disconnect the wiring harness from the valve by gently pulling it apart.
- Carefully remove the old water inlet valve from its position.
- Install the new water inlet valve, ensuring proper alignment.
- Reconnect the wiring harness to the new valve.
- Secure the valve in place with screws or brackets.
- Reattach the water supply line, tightening it with an adjustable wrench.
- Plug the refrigerator back in to restore power.
Ice Maker Thermostat:
- Start by disconnecting the refrigerator from the power source.
- Locate the ice maker thermostat, usually located near the ice maker assembly.
- Using a phillips screwdriver, remove any screws securing the cover or panel protecting the thermostat.
- Carefully detach the wiring harness from the thermostat.
- Remove any screws holding the thermostat in place.
- Gently pull out the old ice maker thermostat.
- Install the new ice maker thermostat, ensuring proper alignment.
- Secure the thermostat in place by tightening the screws.
- Reconnect the wiring harness to the new thermostat.
- Plug the refrigerator back in to restore power.
By following these step-by-step instructions, you can easily replace faulty parts in your whirlpool gold refrigerator’s ice maker. With the right tools and a little patience, you’ll have your ice maker working smoothly again in no time.
Cleaning And Maintaining The Ice Maker
To efficiently repair and maintain your whirlpool gold refrigerator’s ice maker, follow these simple steps. Clean the ice maker regularly by removing any built-up debris and ensuring proper water flow. If any issues persist, consult the user manual or contact a professional for assistance.
A properly functioning ice maker is an essential component of any refrigerator, and regular cleaning and maintenance are crucial in ensuring its efficiency and longevity.
In this section, we will discuss the importance of regular cleaning, provide step-by-step cleaning instructions, and recommend a maintenance schedule to keep your whirlpool gold refrigerator’s ice maker in optimal condition.
Importance Of Regular Cleaning
To maintain the optimal performance of your whirlpool gold refrigerator’s ice maker, regular cleaning is of utmost importance.
Here are several reasons why cleaning your ice maker is essential:
- Prevents the build-up of mineral deposits: Over time, minerals present in water can accumulate in the ice maker, leading to blockages and reduced ice production. Regular cleaning helps remove these deposits, ensuring consistent ice production.
- Eliminates mold and bacteria growth: Moisture and food particles can create an ideal breeding ground for mold and bacteria inside the ice maker. Cleaning the ice maker regularly helps prevent the growth of harmful microorganisms, ensuring safe and hygienic ice for consumption.
- Improves ice quality: A clean ice maker produces ice that is free from unpleasant odors and tastes. Regular cleaning ensures that your ice remains fresh and devoid of any contaminants that may affect its quality.

Step-By-Step Cleaning Instructions
Follow these simple steps to effectively clean your whirlpool gold refrigerator’s ice maker:
- Turn off the ice maker: Locate the switch or lever that controls the ice maker and turn it off. This will prevent ice production during the cleaning process.
- Empty the ice bin: Remove any ice cubes or remaining ice from the ice bin and discard them.
- Remove the ice bin: Take out the ice bin from the refrigerator and set it aside.
- Clean the ice bin: Wash the ice bin with warm water and mild dish soap. Rinse it thoroughly to remove any soap residue.
- Sanitize the ice bin: Prepare a solution of one tablespoon of bleach mixed with one gallon of water. Use a clean cloth or sponge to wipe down the inside of the ice bin with this solution. Rinse the bin thoroughly to remove any traces of bleach.
- Clean the ice maker assembly: Use a clean cloth or sponge to wipe down the ice maker assembly, ensuring all surfaces are thoroughly cleaned. Pay special attention to the ice mold and other components that come into contact with water.
- Reinstall the ice bin: Once the ice bin is completely dry, place it back into the refrigerator, ensuring it is properly aligned.
- Turn on the ice maker: Switch the ice maker back on, allowing it to resume ice production.
Recommended Maintenance Schedule
To keep your whirlpool gold refrigerator’s ice maker in excellent working condition, we recommend following this maintenance schedule:
- Clean the ice maker every three months: Regularly clean the ice maker assembly, as described above, every three months to prevent mineral deposits, mold growth, and ensure optimal ice quality.
- Replace the water filter: Depending on the model, replace the water filter every six months or as recommended by the manufacturer. A clean filter helps maintain water quality and prolong the life of your ice maker.
By following these cleaning instructions and adhering to the recommended maintenance schedule, you can enjoy uninterrupted ice production, a healthier ice supply, and extend the lifespan of your whirlpool gold refrigerator’s ice maker.
Keep your ice maker clean and properly maintained for a steady supply of fresh, odor-free ice whenever you need it.
Ensuring Proper Water Supply
Proper water supply is essential for an ice maker in a whirlpool gold refrigerator to function optimally. If you’re experiencing issues with your ice maker, follow these steps to repair it and ensure a steady flow of water.
A properly functioning ice maker in your whirlpool gold refrigerator relies on a consistent and adequate water supply. If your ice maker is not producing ice or the ice cubes are small, it may be due to water supply issues.
In this section, we will cover three key aspects of ensuring a proper water supply for your ice maker: checking the water supply connection, troubleshooting water supply issues, and replacing the water filter.
Checking Water Supply Connection:
- Inspect the water supply line: Check if the water supply line is properly connected and free from kinks or bends. Ensure that the connection is secure and without any leaks.
- Confirm the water shut-off valve: Make sure the water shut-off valve leading to the fridge is fully open. Sometimes, it may accidentally get partially closed, restricting the water flow.
- Verify the water pressure: Ensure that the water pressure is within the recommended range (20-120 psi). Low water pressure can affect the ice maker’s performance.
Troubleshooting Water Supply Issues:
- Clear blockages in the water line: If the water line is clogged, it can impede water flow to the ice maker. Carefully inspect the line for any obstructions and remove them if found.
- Check the water inlet valve: The water inlet valve controls the flow of water into the ice maker. If it’s malfunctioning, it may prevent water from entering. Consider testing the valve or replacing it if necessary.
- Examine the water filter: A clogged or expired water filter can affect ice production. Ensure the water filter is clean and unclogged. If it’s been longer than six months since the last replacement, it’s time to install a new filter.
Replacing The Water Filter:
- Locate the water filter: Refer to your refrigerator’s user manual to find the location of the water filter. It’s usually located inside the fridge, near the back or bottom.
- Turn off the water supply: Before replacing the filter, be sure to turn off the water supply to avoid any leaks.
- Remove the old filter: Follow the instructions provided by the manufacturer to remove the old water filter.
- Install the new filter: Insert the new water filter into its designated slot and secure it according to the manufacturer’s instructions. Make sure it fits snugly.
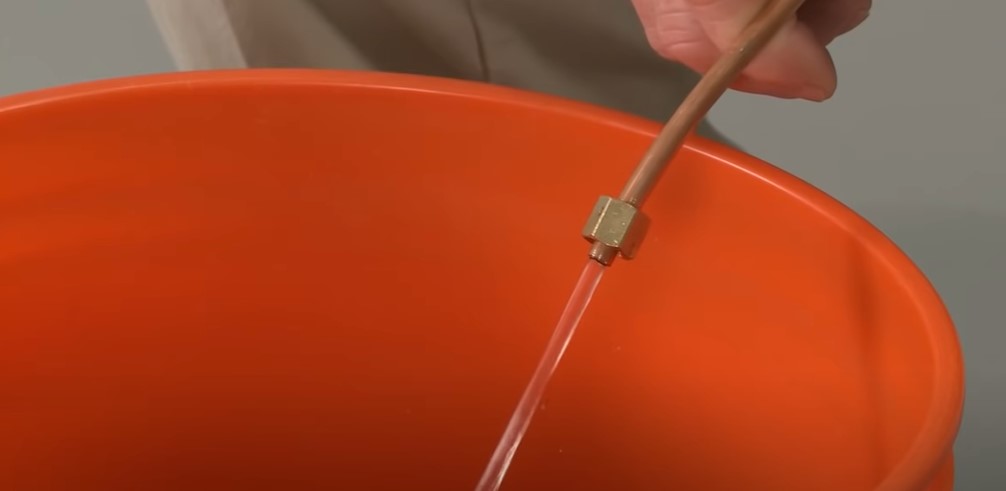
- Turn on the water supply: Once the new filter is in place, turn on the water supply and check for any leaks. Run the water dispenser for a few minutes to flush out any air or impurities in the system.
By following these steps, you can ensure a proper water supply to your whirlpool gold refrigerator’s ice maker, which is essential for optimal ice production.
Remember to periodically check the water supply connection, troubleshoot any issues, and replace the water filter regularly to maintain the efficiency and longevity of your ice maker.
Resetting The Ice Maker
Resetting the ice maker in your whirlpool gold refrigerator is a simple process. Just follow the manufacturer’s instructions to easily repair your ice maker and get it working again.
Steps To Reset The Ice Maker
If you’re facing issues with your whirlpool gold refrigerator’s ice maker, resetting it might help resolve the problem. Here are the steps to follow for resetting the ice maker:
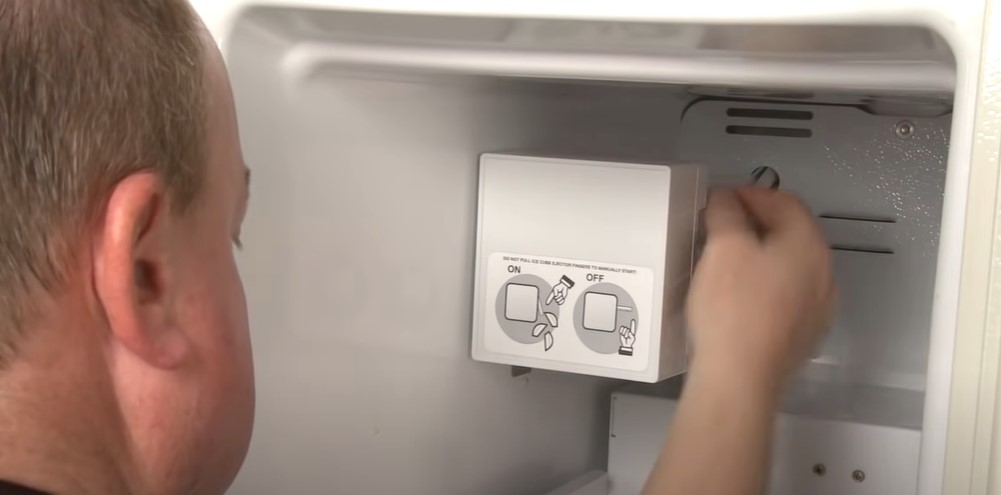
- Turn off the ice maker: Locate the switch or button that controls the ice maker. Depending on the model, it may be a physical switch or a button on the control panel. Press or slide it to the off position.
- Unplug the refrigerator: To ensure a complete reset, unplug the refrigerator from the power source. Leave it unplugged for at least 30 seconds.
- Plug the refrigerator back in: After 30 seconds, plug the refrigerator back into the power source. This will initiate a fresh start for the ice maker.
- Turn on the ice maker: Locate the switch or button again and turn the ice maker back on. Ensure that it is properly set to the “on” position.
- Allow time for the ice maker to reset: Give the ice maker some time to reset and start operating. It may take a few hours for the ice production to begin again.
- Check for ice production: After a few hours, check if the ice maker is producing ice as expected. If the reset was successful, you should notice ice cubes being made.
Troubleshooting If The Reset Doesn’T Solve The Problem
If the reset procedure did not solve the issue with your whirlpool gold refrigerator’s ice maker, there are a few additional troubleshooting steps you can try:
- Verify water supply: Ensure that the water supply to the refrigerator is properly connected and turned on. A disconnected or blocked water line can prevent ice production.
- Check the water filter: If your refrigerator has a water filter, make sure it is not clogged or in need of replacement. A dirty or clogged filter can obstruct water flow and impact ice production.
- Inspect the ice maker components: Examine the ice maker components, such as the ice mold, water inlet valve, and ice bin, for any signs of damage or obstruction. Clear any debris or ice buildup that may be interfering with the ice maker’s functionality.
- Reset temperature settings: Adjust the refrigerator’s temperature settings to the recommended levels. Extreme temperatures can affect ice production, so ensure that the freezer is set between 0 and 5 degrees fahrenheit (-18 to -15 degrees celsius).
- Contact customer support: If all troubleshooting steps fail to resolve the issue, it is advised to reach out to whirlpool’s customer support for further assistance. They can provide specific guidance tailored to your model and help address any underlying problems.
Remember, resetting the ice maker can often resolve common issues. However, if the problem persists, don’t hesitate to explore further troubleshooting options or seek professional support.
Additional Tips And Tricks
Discover valuable tips and tricks to troubleshoot and repair the ice maker in your whirlpool gold refrigerator. From identifying common issues to step-by-step instructions, this guide will help you get your ice maker working like new.
Maximizing Ice Production
- Keep the freezer temperature at or below 0°f (-18°c) to ensure optimal ice production.
- Regularly clean the ice maker and the ice bin to prevent any buildup or obstruction that may hinder ice production.
- Make sure the water supply line is connected correctly and the water filter is clean and free from debris. A clogged filter can affect the flow of water to the ice maker.
- Avoid placing warm items in the freezer as this can cause the ice maker to work harder to cool down and produce ice.
- Check the water pressure to ensure it is within the recommended range for ice production. Low water pressure can affect the ice maker’s performance.
Extending The Lifespan Of The Ice Maker
- Regularly inspect the ice maker for any signs of damage or wear. Replace any faulty parts immediately to prevent further damage.
- Clean the condenser coils at least once a year to ensure efficient operation and prevent overheating. Dirty coils can strain the ice maker and shorten its lifespan.
- Avoid overfilling the ice bin as this can put excessive stress on the ice maker unit. Follow the manufacturer’s recommendations for the maximum ice capacity.
- If you are going on vacation or not using the ice maker for an extended period, consider turning it off to conserve energy and prevent unnecessary wear.
- Use a water softener if your water supply has high mineral content. Hard water can cause mineral deposits to build up in the ice maker, affecting its performance and lifespan.
- If the ice cubes are cloudy or have an unusual taste, try changing the water filter or using a water filtration system to improve water quality.
- To speed up ice production, lower the freezer temperature temporarily, but be cautious not to freeze the food in the surrounding areas.
- If the ice maker is not producing ice at all, check if the water supply valve is fully open. Adjust it if necessary.
- Consider investing in an ice maker cleaning solution or using a mixture of vinegar and water to descale the ice maker and remove any mineral deposits.
- If the ice cubes are too small or hollow, it may indicate a problem with the water inlet valve or the water pressure. Consult the user manual or a professional technician for assistance.
Remember, proper care and maintenance of your whirlpool gold refrigerator’s ice maker will ensure optimal performance and a longer lifespan.
Safety Precautions
Learn how to safely repair the ice maker in your whirlpool gold refrigerator with these step-by-step instructions. Ensure your safety by following these precautions.
Safety Measures To Take Before Working On The Ice Maker
When it comes to repairing your whirlpool gold refrigerator’s ice maker, it is crucial to prioritize safety precautions. Here are some essential measures to take before getting started:
- Unplug the refrigerator: Before you begin any repairs, ensure that the refrigerator is disconnected from its power source. This step is necessary to avoid any electrical accidents or shocks.
- Wear protective gear: Always put on appropriate safety gear, such as gloves and safety goggles, to protect yourself from potential harm. Dealing with parts and tools can sometimes lead to minor accidents, so it’s better to be safe than sorry.
- Read the user manual: Familiarize yourself with the refrigerator’s user manual and locate the ice maker troubleshooting section. This will provide you with valuable information on the workings of the ice maker and safety precautions specific to your model.
- Gather the necessary tools: Before you begin the repair process, assemble all the required tools. These may include a screwdriver, pliers, socket set, and a multimeter. Having all the necessary tools within reach will not only save you time but also ensure a smooth repair process.
- Clear the area: Clear the area around the refrigerator, removing any obstacles or clutter. This will provide you with ample space to work and minimize the risk of accidents or damaging other objects.
Potential Risks And How To Avoid Them:
While repairing the ice maker in your whirlpool gold refrigerator, it is crucial to be aware of potential risks and take the necessary precautions to avoid them.
Here are some common risks and how you can mitigate them:
- Electrical hazards: Since you are dealing with electrical components, there is a risk of electric shock. To avoid this, unplug the refrigerator before starting any repair work, and avoid touching any exposed wires or terminals.
- Injury from moving parts: Some parts of the ice maker may have sharp edges or move rapidly. Take extra care when handling these components, and consider wearing protective gloves to avoid cuts or injuries.
- Damage due to incorrect installation: Improperly installing or reassembling the ice maker can cause further issues or damage. Always refer to the user manual for guidance and double-check your work before powering on the refrigerator.
- Water leaks: During the repair process, be cautious of potential water leaks from the ice maker. To minimize this risk, have towels or absorbent material on hand, and take care when removing and reattaching water lines.
- Chemical exposure: Certain cleaning agents or solvents may be required for cleaning or maintenance. Always follow the manufacturer’s instructions and ensure proper ventilation when using these chemicals.
By following these safety measures and being aware of potential risks, you can proceed with repairing the ice maker in your whirlpool gold refrigerator with confidence and reduce the likelihood of accidents or further damage.
Remember to prioritize your safety and take all necessary precautions throughout the repair process.
FAQs: How To Repair Ice Maker In Whirlpool Gold Refrigerator?
Why Is My Whirlpool Gold Ice Maker Not Working?
Your whirlpool gold ice maker may not be working due to several reasons. First, check the water supply by ensuring the water valve is open and the water line is not kinked. Second, make sure the ice maker is turned on and the control arm is down.
Third, examine the water filter for any clogs or blockages that may affect ice production. If these steps do not resolve the issue, consider checking the ice maker’s temperature settings to ensure they are set correctly. Clean the ice mold and sensors to prevent any buildup that may disrupt ice making.
If problems persist, it is recommended to contact a professional technician for further assistance. Regular maintenance, such as regular cleaning and inspection, can help keep your whirlpool gold ice maker working efficiently.
Where Is The Reset Button On The Ice Maker On A Whirlpool Gold Refrigerator?
The reset button on the ice maker of a whirlpool gold refrigerator is located near the ice maker control panel.
Why Has My Whirlpool Ice Maker Stopped Making Ice?
The whirlpool ice maker might temporarily stop making ice due to a few common reasons. First, check if the water supply is turned on and the water line isn’t clogged. Ensure that the freezer temperature is set below 10°f (-12°c).
Examine the ice maker’s control arm to confirm it’s in the down position. If the ice maker is jammed with ice, remove any obstructions and wait for it to cycle and produce ice again. Clean the ice maker’s bin and remove any stuck ice cubes that might prevent new ice formation.
Finally, if none of these troubleshooting steps work, it’s advisable to consult a professional technician to diagnose and fix the issue.
How To Troubleshoot An Ice Maker In A Whirlpool Refrigerator?
To troubleshoot an ice maker in a whirlpool refrigerator, follow these steps:
1. Check the water supply: ensure that the refrigerator is properly connected to the water supply, and that the water valve is turned on.
2. Inspect the water inlet valve: look for any clogs or damage in the water inlet valve. Replace the valve if necessary.
3. Examine the water line: inspect the water line for any blockages or leaks. Clear any obstructions and repair any leaks.
4. Test the ice maker motor: use a multimeter to test the ice maker motor for continuity. If the motor is faulty, it will need to be replaced.
5. Inspect the ice maker assembly: check for any ice buildup or obstructions in the ice maker assembly. Clean or remove any obstacles.
6. Reset the ice maker: if none of the above steps resolve the issue, try resetting the ice maker by turning off the power to the refrigerator for a few minutes, then turning it back on.
Remember to refer to your whirlpool refrigerator manual for specific instructions and diagrams.
Conclusion
To sum up, repairing the ice maker in your whirlpool gold refrigerator can be a straightforward process with the right knowledge and tools. By following the steps we have outlined, you can identify and resolve common issues such as clogged water lines, faulty valves, or a malfunctioning control module.
Remember to turn off the power before starting any repairs and consult the user manual for specific instructions. Regular maintenance, such as cleaning the ice maker and replacing water filters, can also prolong its lifespan and ensure optimal performance. If you encounter more complex problems or are unsure about any aspect of the repair, it is recommended to seek professional assistance.
With the help of this guide, you can save time and money by troubleshooting and resolving ice maker issues in your whirlpool gold refrigerator on your own.