To replace the ice maker water line on a whirlpool refrigerator, first turn off the water supply and unplug the refrigerator. Then, remove the old water line and install the new one, securing it with the appropriate fittings and ensuring that it is properly aligned.
If your whirlpool refrigerator’s ice maker water line is damaged or needs to be replaced, it’s important to address the issue promptly. A damaged water line can lead to leaks, low water pressure, and potentially even more serious problems over time.
Fortunately, replacing the water line is a simple and straightforward task that can be completed in just a few easy steps.
In this article, we’ll walk you through the process of replace ice maker water line on Whirlpool refrigerator from start to finish, so you can handle the repair with confidence.

Introduction To Ice Maker Water Line Replacement
When it comes to your whirlpool refrigerator, the ice maker water line is an essential component that ensures the ice maker’s proper functioning. Over time, the water line can wear out or develop damages, causing problems with the ice maker’s performance.
In this post, we will take a closer look at the reasons why you might need to replace the ice maker water line on your whirlpool refrigerator. The most common issues you can face, essential safety precautions, required tools and equipment, and things to know before starting the replacement process.
Why You Might Need To Replace Ice Maker Water Line On Whirlpool Refrigerator
There are several reasons why you might need to replace your whirlpool refrigerator’s ice maker water line. The most common ones include:
- Your refrigerator is old, and the water line is reaching the end of its lifespan.
- The water line is damaged, causing leaks or reducing the flow of water to the ice maker.
- You notice mold, dirt, or other signs of contamination within the line.
- The water line has become clogged, causing issues with the ice maker’s operation.
Examples Of Common Problems
When the ice maker water line on your whirlpool refrigerator is not functioning correctly, you may experience several problems, including:
- The ice maker stops producing ice altogether
- The ice maker produces ice with an odd smell or taste
- Water begins to leak from the water line or the refrigerator
- Slow production of ice or poor ice quality
What You Need To Know Before Starting
Before starting the replacement process, here are some essential things you need to keep in mind:
- Determine the right size of the water line that your refrigerator uses to avoid damaging the unit.
- Ensure that you switch off the water supply before attempting replacement.
- Draining the water line will be necessary before and after the replacement process.
- You may need the help of an experienced technician if you are unsure of what to do.
Safety Precautions To Take
Replacing the ice maker water line on your whirlpool refrigerator requires utmost safety precautions, including:
- Switch off the power supply to your refrigerator to avoid electrical accidents.
- Always wear gloves to prevent accidents and avoid water contamination.
- Ensure all water leaks and spills are cleaned up before switching on the refrigerator for safety reasons.
Tools And Equipment Required
Here are some of the tools and equipment you will need:
- A replacement water line of the same size
- A wrench or pliers
- Teflon tape or other sealing products
- A bucket or large container to catch water from the water line
Replacing the ice maker water line on your whirlpool refrigerator is easy and can be performed by anyone with basic skills and knowledge. Ensure you observe all safety measures and follow the replacement guide for a seamless experience.
Step-By-Step Instructions For Replacing Ice Maker Water Line
Shutting Off The Water Supply
Before you begin replacing the ice maker water line on your whirlpool refrigerator, make sure to shut off the water supply.
Follow these steps to do so:
- Locate the shut-off valve for your refrigerator’s water supply. This may be under your kitchen sink, in your basement, or near your main water line.
- Turn the valve to the right to shut off the water supply.
- Check to ensure that the water supply has been completely shut off.
Removing The Old Water Line
After shutting off the water supply, you’re ready to remove the old ice maker water line. Follow these steps:
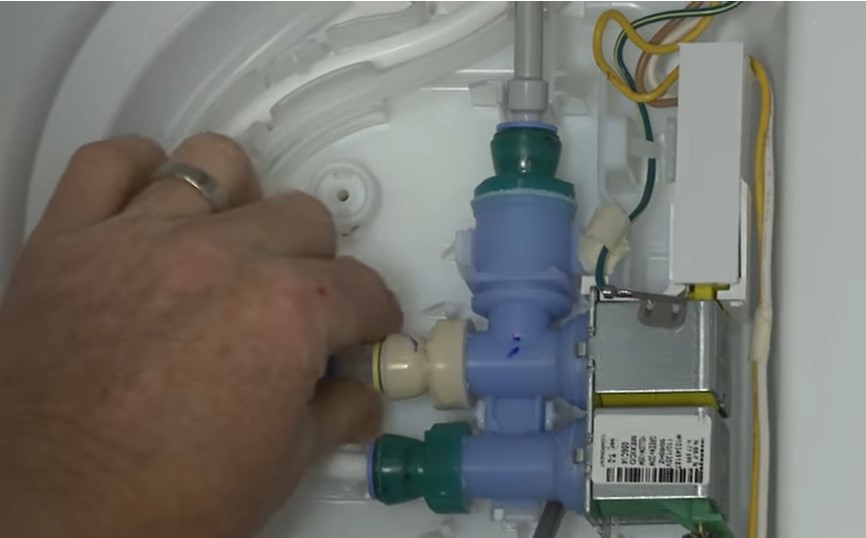
- Locate the old water line. It will be connected to the back of the refrigerator and the shut-off valve.
- Carefully remove any clamps or brackets holding the water line in place.
- Gently pull the water line out of the refrigerator and the shut-off valve.
Installing The New Water Line
Now that you’ve removed the old water line, you’re ready to install the new one. Follow these steps:
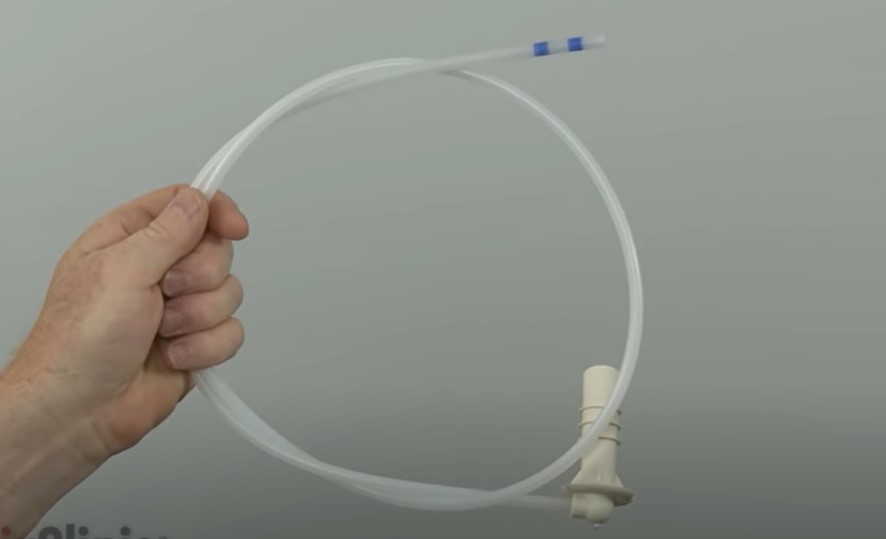
- Measure and cut the new water line to the appropriate length.
- Attach one end of the new water line to the back of the refrigerator. Use a clamp or bracket to secure it in place.
- Attach the other end of the water line to the shut-off valve. Use a clamp or bracket to secure it in place.
Testing The New Water Line
After installing the new water line, it’s important to test it to ensure it’s functioning properly. Follow these steps:
- Turn the water supply valve back on.
- Check the connection points for any signs of leaks.
- Run a cycle through the ice maker to test the new water line.
Congratulations! You have now successfully replaced the ice maker water line on your whirlpool refrigerator. Remember to always follow these steps carefully and shut off the water supply before making any repairs to your appliance.
Tips For Successful Ice Maker Water Line Replacement
Replacing an ice maker water line on a whirlpool refrigerator can seem like a daunting task, but with the right preparation and execution, it can be a straightforward process. Here are some tips to help ensure your ice maker water line replacement project goes as smoothly as possible.
Common Mistakes To Avoid
- Over-tightening fittings: When attaching the new water line, be careful not to over-tighten the fittings. Over-tightening can lead to leaks and damage to the water line.
- Using the wrong tools: Make sure you have the correct tools for the job, such as a wrench or pliers. Using the wrong tools can damage the water line or its fittings.
- Troubleshooting tips: If you run into a problem during the replacement process, shut off the water supply valve and troubleshoot the issue before continuing.
- What to do if the new line leaks: If the new water line leaks, double-check that all fittings are tight and that the line is properly secured. If the issue persists, replace the line again and try a different connection method.
- Issues with the ice maker after installing a new line: If you experience any issues with the ice maker after replacing the water line, double-check that everything is properly connected and that the water supply valve is fully open.
With these tips in mind, you should be able to replace your whirlpool refrigerator’s ice maker water line with confidence. Remember to work carefully and methodically, taking your time to ensure a successful installation.
When To Call A Professional?
Whirlpool refrigerators are popular and dependable appliances used in many households around the world. However, like all appliances, they may require some maintenance from time to time. If you are experiencing issues with your ice maker water line, you may need to replace it.
Here is what you need to know about when to call a professional for help:
Situations Where You May Need Professional Help
Whether you are handy with tools or a diy enthusiast, some situations require the help of a professional. Here are some scenarios that might require you to call in an expert to replace your ice maker water line:
- Complicated installations
Installing an ice maker water line requires a certain level of plumbing knowledge. If the installation is complex and beyond your abilities, don’t hesitate to contact a professional plumber.
- Limited plumbing experience
If you’ve never installed a water line before and feel unsure of your capabilities, it is best to call a professional. Hiring a plumber who has years of experience with such installations will give you the peace of mind that the job will be done right.
- Choosing the right professional for the job
When it comes to hiring a professional plumber, it’s vital to choose the right one for the job. A qualified technician who specialises in ice maker water line replacements will ensure that the job is done to your satisfaction.
- Finding a qualified technician
Finding an experienced technician who is reliable can be a daunting task. Ask friends, colleagues, and family members for referrals. You can also search online for customer reviews or contact your local home appliance store to find a reputable technician.
- What to consider when hiring
When looking for a technician to replace your ice maker water line, there are several factors to consider. Check the plumber’s license and insurance coverage. Additionally, ask for estimates from different plumbers, so you can compare their pricing and see which one fits your budget.
While it’s possible to replace your ice maker water line as a diy project, some situations require the assistance of a professional plumber. With the help of a qualified technician, you can ensure that your whirlpool refrigerator remains in good working condition, providing you with crystal-clear ice for your drinks whenever you need it.
FAQs: How To Replace Ice Maker Water Line On Whirlpool Refrigerator?
How Do I Know If My Ice Maker Water Line Needs Replacing?
One sign that the ice maker water line needs replacing is when the ice maker stops making ice. You may also notice leaks or a decrease in water pressure.
What Tools And Materials Do I Need To Replace The Water Line?
You will need a nut driver, adjustable wrench, tubing cutter, Teflon tape, and a replacement water line. These can usually be found at hardware stores or online.
Is It Difficult To Replace An Ice Maker Water Line?
Replacing an ice maker water line can be a bit challenging, but it’s definitely doable for the average DIYer. Just make sure you have the proper tools and materials, and follow the directions carefully.
Can I Replace The Water Line Myself Or Should I Hire A Professional?
If you’re comfortable using tools and following instructions, you can replace the water line yourself. However, if you’re unsure of your abilities, it’s better to hire a professional to avoid causing damage to your refrigerator.
How Often Should I Replace My Ice Maker Water Line?
While there’s no set timeline for replacing an ice maker water line, it’s generally a good idea to replace it every 5-7 years to prevent leaks and ensure proper water flow.
Conclusion
Replacing the ice maker water line of your whirlpool refrigerator may seem like a daunting task, but with the right tools and guidance, it can be done easily. The first step is to gather the necessary tools, follow the steps carefully, and take your time.
Remember to shut off the water supply to the refrigerator before starting the process. It is also important to ensure that the new hose is secure and leak-free before turning the water back on and testing the ice maker. Regular cleaning and maintenance of your refrigerator, including replacing the water line, will prolong the life of your appliance and save you money in the long run.
With the right knowledge and tools, this is a simple DIY project that anyone can do. Don’t hesitate to put your newfound skills to the test and replace your whirlpool refrigerator’s water line today!